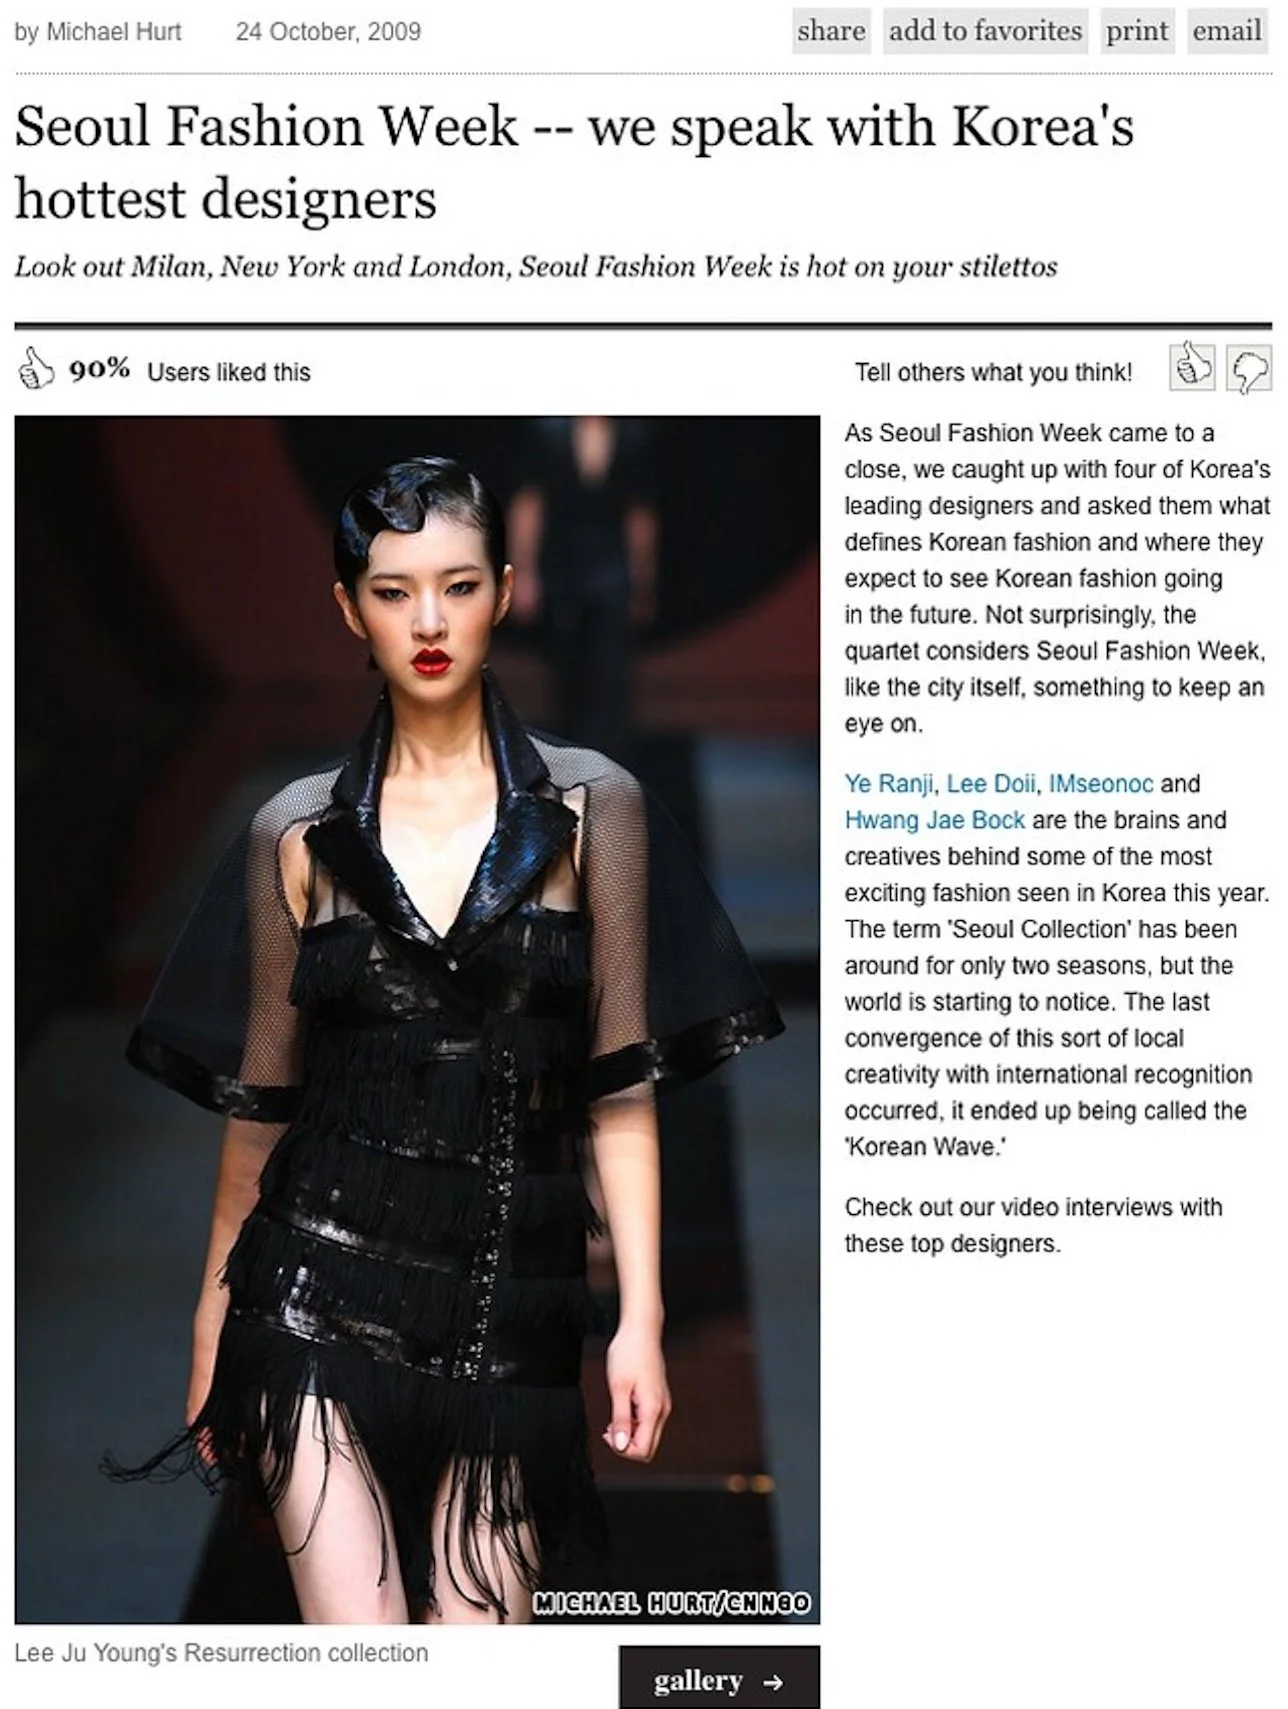
You Paid How Much to Shoot on Auto?
What your camera can actually do — and how to make it do it.
Somewhere in your apartment there is a camera that cost more than your phone, more than your laptop, possibly more than a month's rent. It came with a lens. It has dials and buttons you've never fully mapped. It produces images that are, on a good day, marginally better than what your phone produces, which means you mostly use your phone.
The camera comes out for trips. For occasions. For the once-in-a-blue-moon moment when you think: today is the day I actually use this thing.
And then the light is wrong, or the settings are confusing, or someone's face comes out dark against a bright background and you don't know how to fix it in the moment, so you point your phone at the scene instead and get a perfectly adequate shot that will look fine on Instagram and terrible anywhere else. The expensive camera goes back in the bag.
This is the gap The Field was built to close.
Here's the thing about learning to see light — and this is something you can start doing right now, before you've touched a single dial: a photographer looks at a large café window covered by sheer white curtains and sees a softbox. The fabric diffuses the sunlight coming through, spreading it evenly across whatever is sitting in front of it — your coffee, your friend's face, the food you're about to photograph. That window is doing exactly what a studio softbox does, and it's doing it for free. If you positioned your friend in that light, you'd get a beautifully soft, flattering portrait without a single piece of equipment.
Or step outside on a heavily overcast day and look at the ground. No shadows. Nothing casts a shadow anywhere — not a tree, not a building, not a person standing in the middle of the street. That's because the entire sky is acting as one enormous softbox, wrapping light around everything from every direction simultaneously so there's nothing left to cast a shadow. Fashion photographers chase overcast days specifically for this reason. The light is free, it's everywhere, and it's already doing what would take thousands of dollars of studio equipment to replicate indoors.
And here's where having a real camera with a flash attachment gives you something a phone never can: on that same overcast day, you can add a strobe. The flat, even sky light becomes your base — no harsh shadows, everything beautifully wrapped — and the flash adds a pop of directional light that makes your subject suddenly lift off the frame. The image has depth, dimension, presence. It looks like it was made, not just taken. That combination — the enormous natural softbox above you and a single controlled strobe in your hand — is something photographers spend years learning to achieve in a studio. On an overcast day in Seongsu, it's just the sky and a ₩300,000 flash unit.
Which brings up the other thing worth saying about that expensive camera sitting in your apartment: your phone is lying to you about how good its images are. Not maliciously — it's doing everything it can with a sensor the size of your thumbnail. But what it's doing is heavily compressing the image, running it through computational processing, and handing you something that looks excellent on a screen. Take that same file and try to print it large — wall poster size, because everyone loves the picture and wants it blown up — and you'll start to see the truth. The compression artifacts. The edge-enhancement that starts to look almost like hand-drawn line art at large sizes. The loss of actual photographic data that no amount of AI sharpening can recover, because it was never there to begin with. Your camera, by contrast, is capturing real photographic data — millions of actual light measurements packed into a file that can be enlarged, cropped, and printed without falling apart. That's what you paid for. It would just be a shame to never find out what it can actually do.
Once you start seeing light this way — as something with direction, quality, and behavior that you can read and use — the camera stops being a complicated machine and starts being the tool you use to capture what you're already seeing. The technical knowledge exists to serve that vision. The vision comes first.
That said: the technical knowledge still has to be there. Because when you do pull the camera out — when you're on a rooftop in Itaewon, golden hour hitting the Han River behind a group of friends, the kind of scene that practically composes itself — and the image comes back flat, overexposed, nothing like what your eyes saw, you need to know why. And you need to know how to fix it before the light changes.
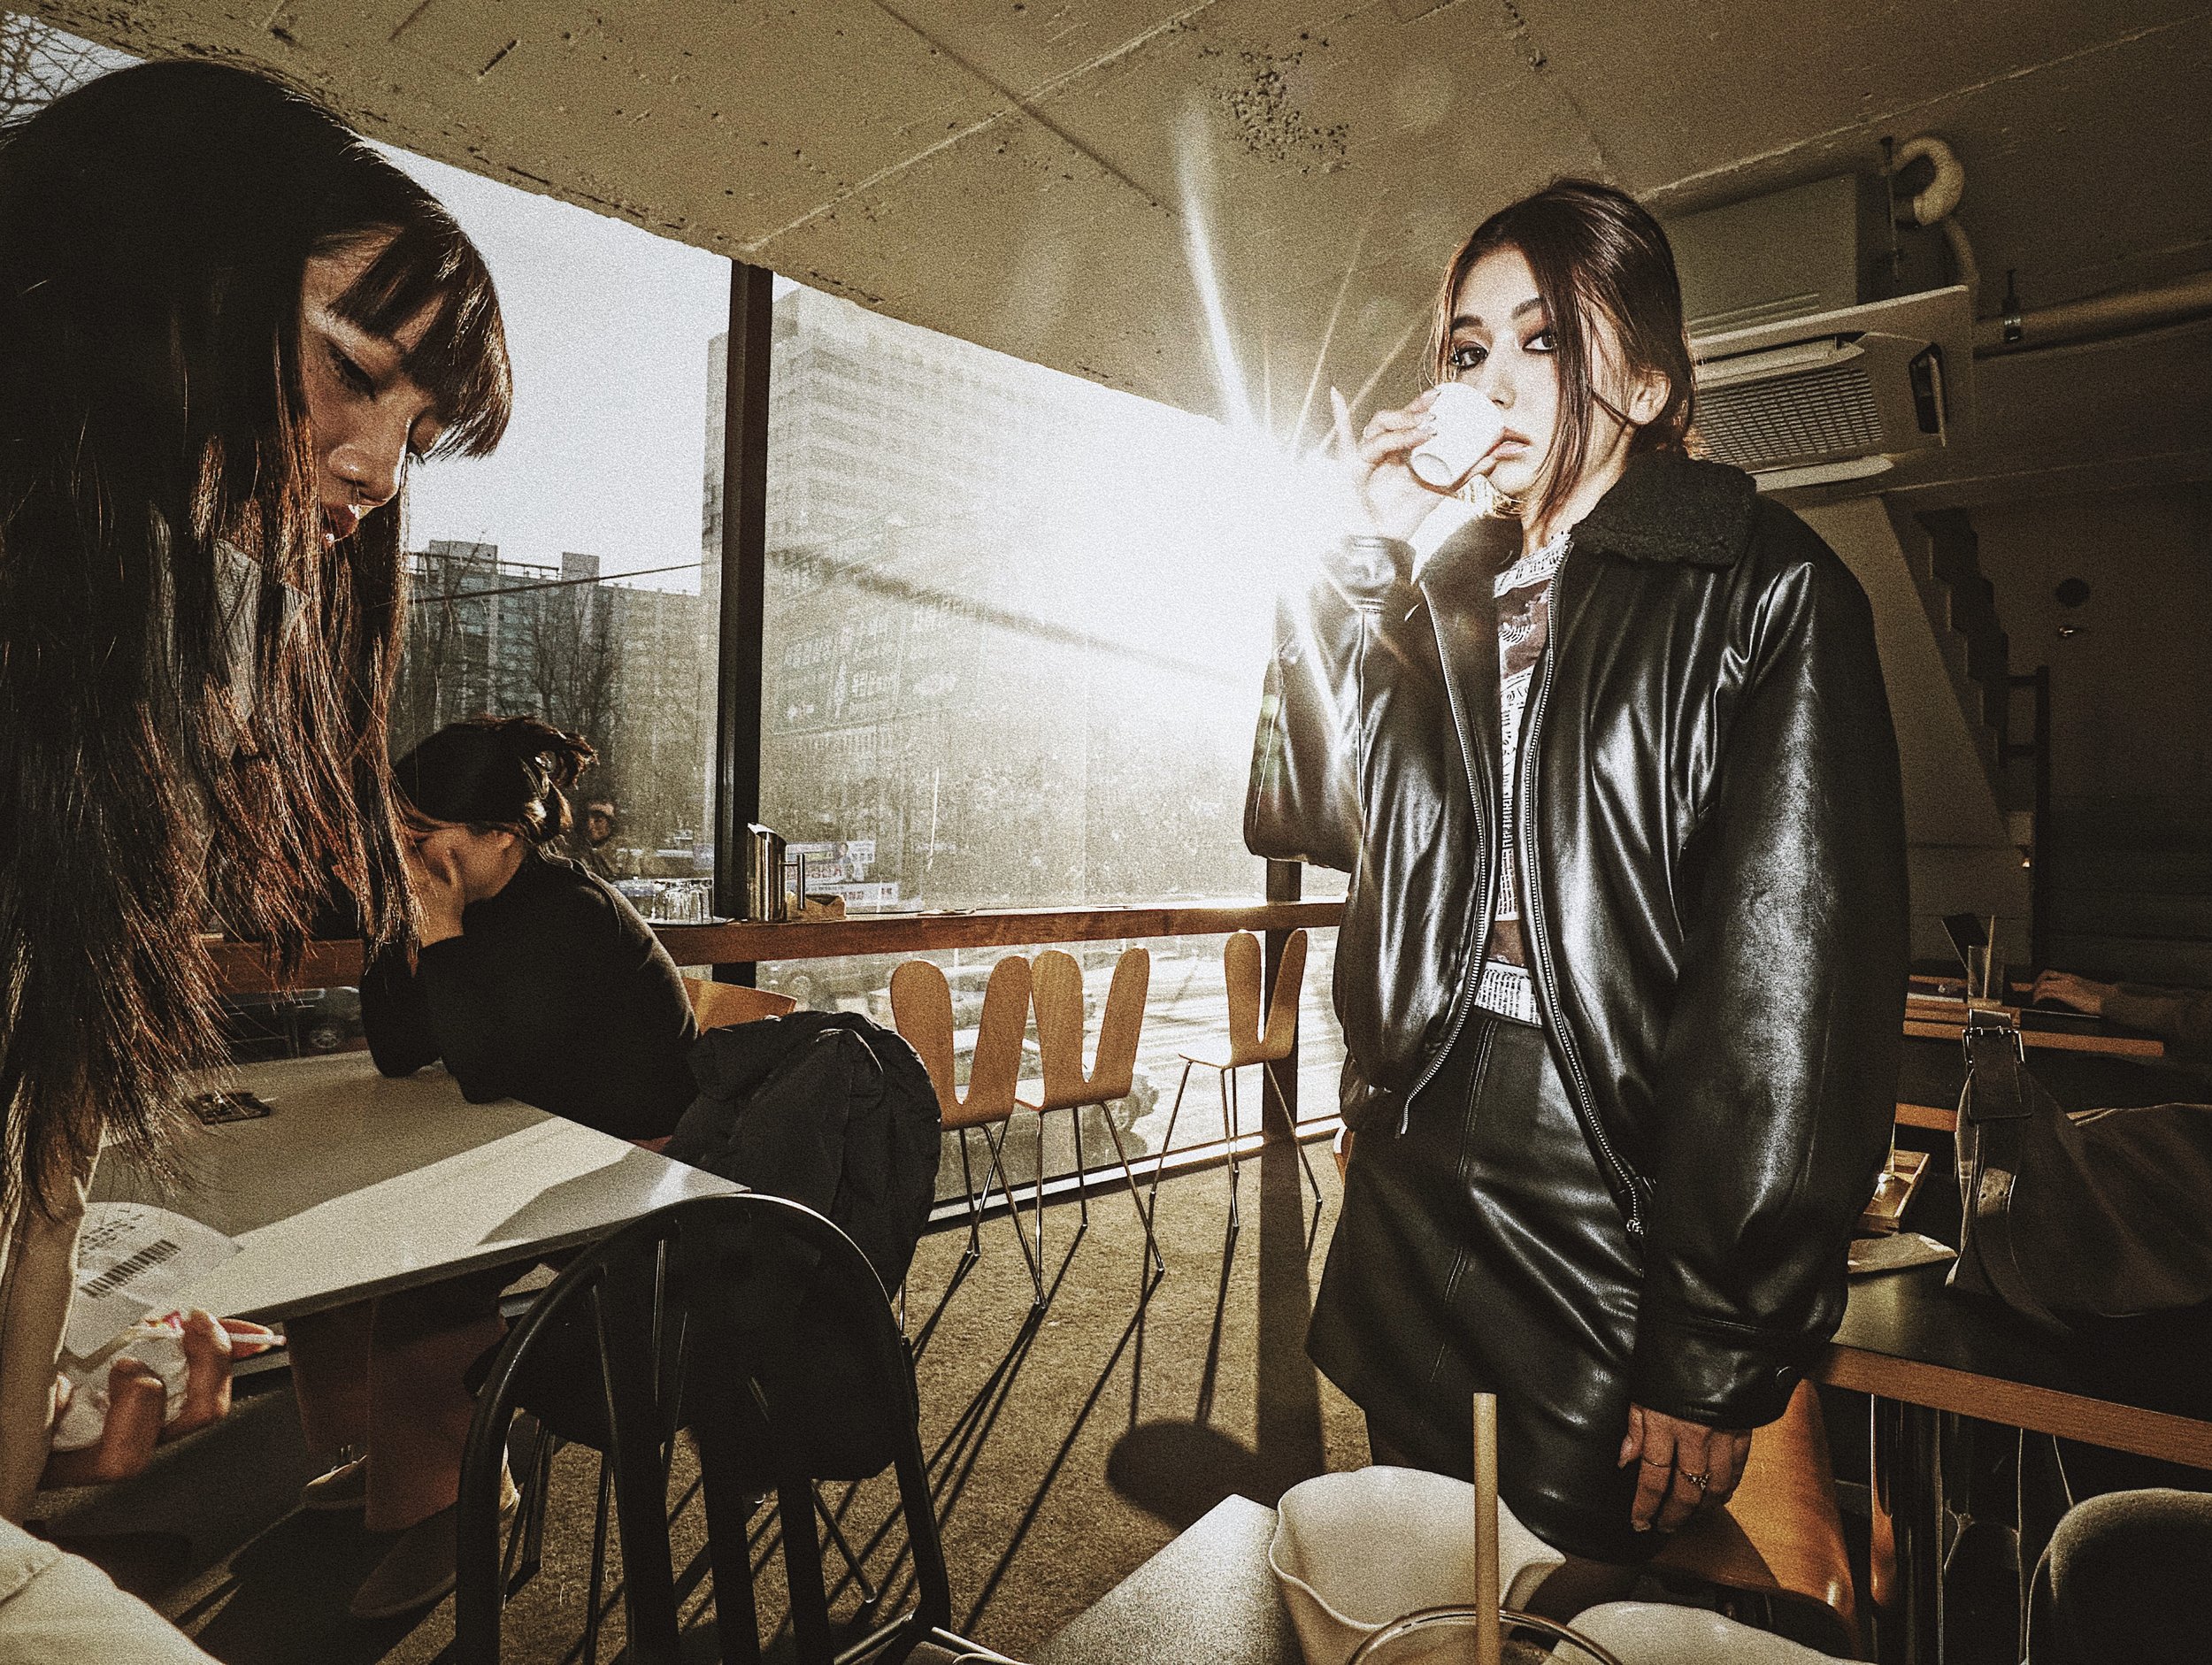
Shot in a Seoul café, available sunlight plus a hotshoe-mounted speedlight on TTL auto. This is not a complicated setup.
Canon EOS 6D Mark II | EF 16-35mm f/4L IS USM | 16mm | f/16 | 1/160s | ISO 1600.
The exposure here is actually two separate decisions happening in the same frame. The camera is exposed for the sky outside the window — f/16 at 1/160s, which renders that dramatic starburst from the sun and keeps the outdoor scene correctly exposed while everything inside goes dark. The flash then handles everything within range independently — and at ISO 1600, the sensor is sensitive enough that the flash doesn't need much power to register correctly on a nearby subject even at f/16. The indoor subject and the outdoor sky are lit by completely different light sources, metered separately, combined in a single frame.
That starburst, by the way, is not a filter. It's a direct consequence of f/16 — very narrow apertures diffract light around the iris blades, turning any point light source into a star. This is physics, not post-production.
One camera. One onboard flash on auto. Two completely independent exposure decisions in the same frame. That's the whole setup.

Same technique, different Seoul. One camera, one hotshoe-mounted speedlight on TTL auto.
Canon EOS 6D Mark II | EF 16-35mm f/4L IS USM | 16mm | f/14 | 1/160s | ISO 100.
Here the open sky is the backlight instead of a café window. ISO dropped to 100 — clean base, full daylight — and the aperture pulled back slightly to f/14, letting just enough sky register as that deep saturated blue while pushing the street and buildings into dramatic shadow. The flash handles everything within range at the front, punching through cleanly at ISO 100 because the subject is close. The 문화거리 (munhwa-geori / culture street) signpost places it in Seoul immediately.
Two completely different images. Two completely different moods. One decision at the root of both: expose for the background, let the flash handle the subject. ISO 1600 indoors with a bright window. ISO 100 outdoors under open sky. The variables change. The logic doesn't.
How These Pictures Actually Happened — And What That Tells You
Here's the honest version of how the café shot was made.
There were two models in the café before a meeting to discuss concepts before a shoot. The goal wasn't a posed editorial portrait — it was b-roll. Candid cuts. The kind of shots that look like a scene from a movie rather than a photo session. Nobody looking at the camera. Nobody performing. Just two people in a Seoul café who happened to look effortlessly cool.
The technical setup was already locked in for outdoor shooting: f/16, 1/160s — settings that expose correctly for a bright sky, which means indoors without flash everything goes dark as night. The flash was on auto, set to focus on the nearest, largest object in the frame using super auto focus. Which meant the camera would find whoever was closest and flash-expose for them automatically. The background — the window, the sky, the starburst sun — was already handled by the manual exposure settings. That wasn't going to change no matter what happened in the foreground.
So the technical problem was already solved before the shooting started. The sky was taken care of. The flash would take care of whatever was in front of it. The starburst would happen at f/16 because physics.
Here's what was on auto: autofocus set to find the nearest, largest object in the frame — which in a café means whoever is closest to the lens. Flash exposure on TTL auto — meaning the flash reads the manually set aperture and shutter values and calculates its own power output accordingly, firing at exactly the strength needed to correctly expose whatever is in front of it without blowing it out. The flash here is a camera-mounted speedlight — not a built-in pop-up flash, but a hotshoe unit that sits on top of the camera. Standard kit, not exotic. A decent speedlight runs ₩200,000–300,000 and is one of the most useful things you can own as a photographer. Both systems were trusted completely and left alone.
Here's what was on manual: aperture at f/16, shutter at 1/160s. Those two settings were locked and not touched. They existed to handle the sky. Everything else was delegated.
This is a more sophisticated way to shoot than either full auto or full manual. Full auto means the camera is guessing at everything simultaneously, and its guess is optimized for a generic correct exposure rather than a specific creative one. Full manual means you're adjusting every variable yourself, which is slow and unnecessary when certain systems — autofocus, TTL flash — are genuinely better at their specific jobs than a human making real-time calculations. The skill is knowing which decisions to own and which to hand off. Manual exposure for the sky, because that's a creative decision. Auto flash power, because that's a calculation. Auto focus on nearest large subject, because that's a speed decision.
All that was left was to wait.
Wait for the model drinking coffee to lift the cup at the right angle. Wait for the other model to lean into the table in a way that read as genuinely absorbed rather than performed. Wait for the moment where two people in a frame stop looking like subjects and start looking like characters.
That's it. That's the whole shot.
This is what it looks like to think like a photographer: not scrambling to solve technical problems in the moment, but solving them in advance so that when the moment arrives, the only thing left to do is recognize it and press the shutter. The exposure equation was settled. The flash was on auto and trusted to do its job. The creative decision — the actual photography — was in the waiting and the watching.
The outdoor shot on the street worked the same way. Sky exposed for, subject handled by flash, settings locked. The photographer's job at that point isn't technical. It's directorial. Where does the subject stand relative to the signpost. What angle makes the 문화거리 text readable. How low do you get with a 16mm lens to make the sky fill the frame above her. Those are compositional and editorial decisions — and they only become possible once the technical side is no longer taking up mental bandwidth.
This is what The Field is actually teaching. Not just how to use the tools. How to use them fast enough and confidently enough that they disappear — so that what's left is the picture.
When to Put the Fancy Kit Down
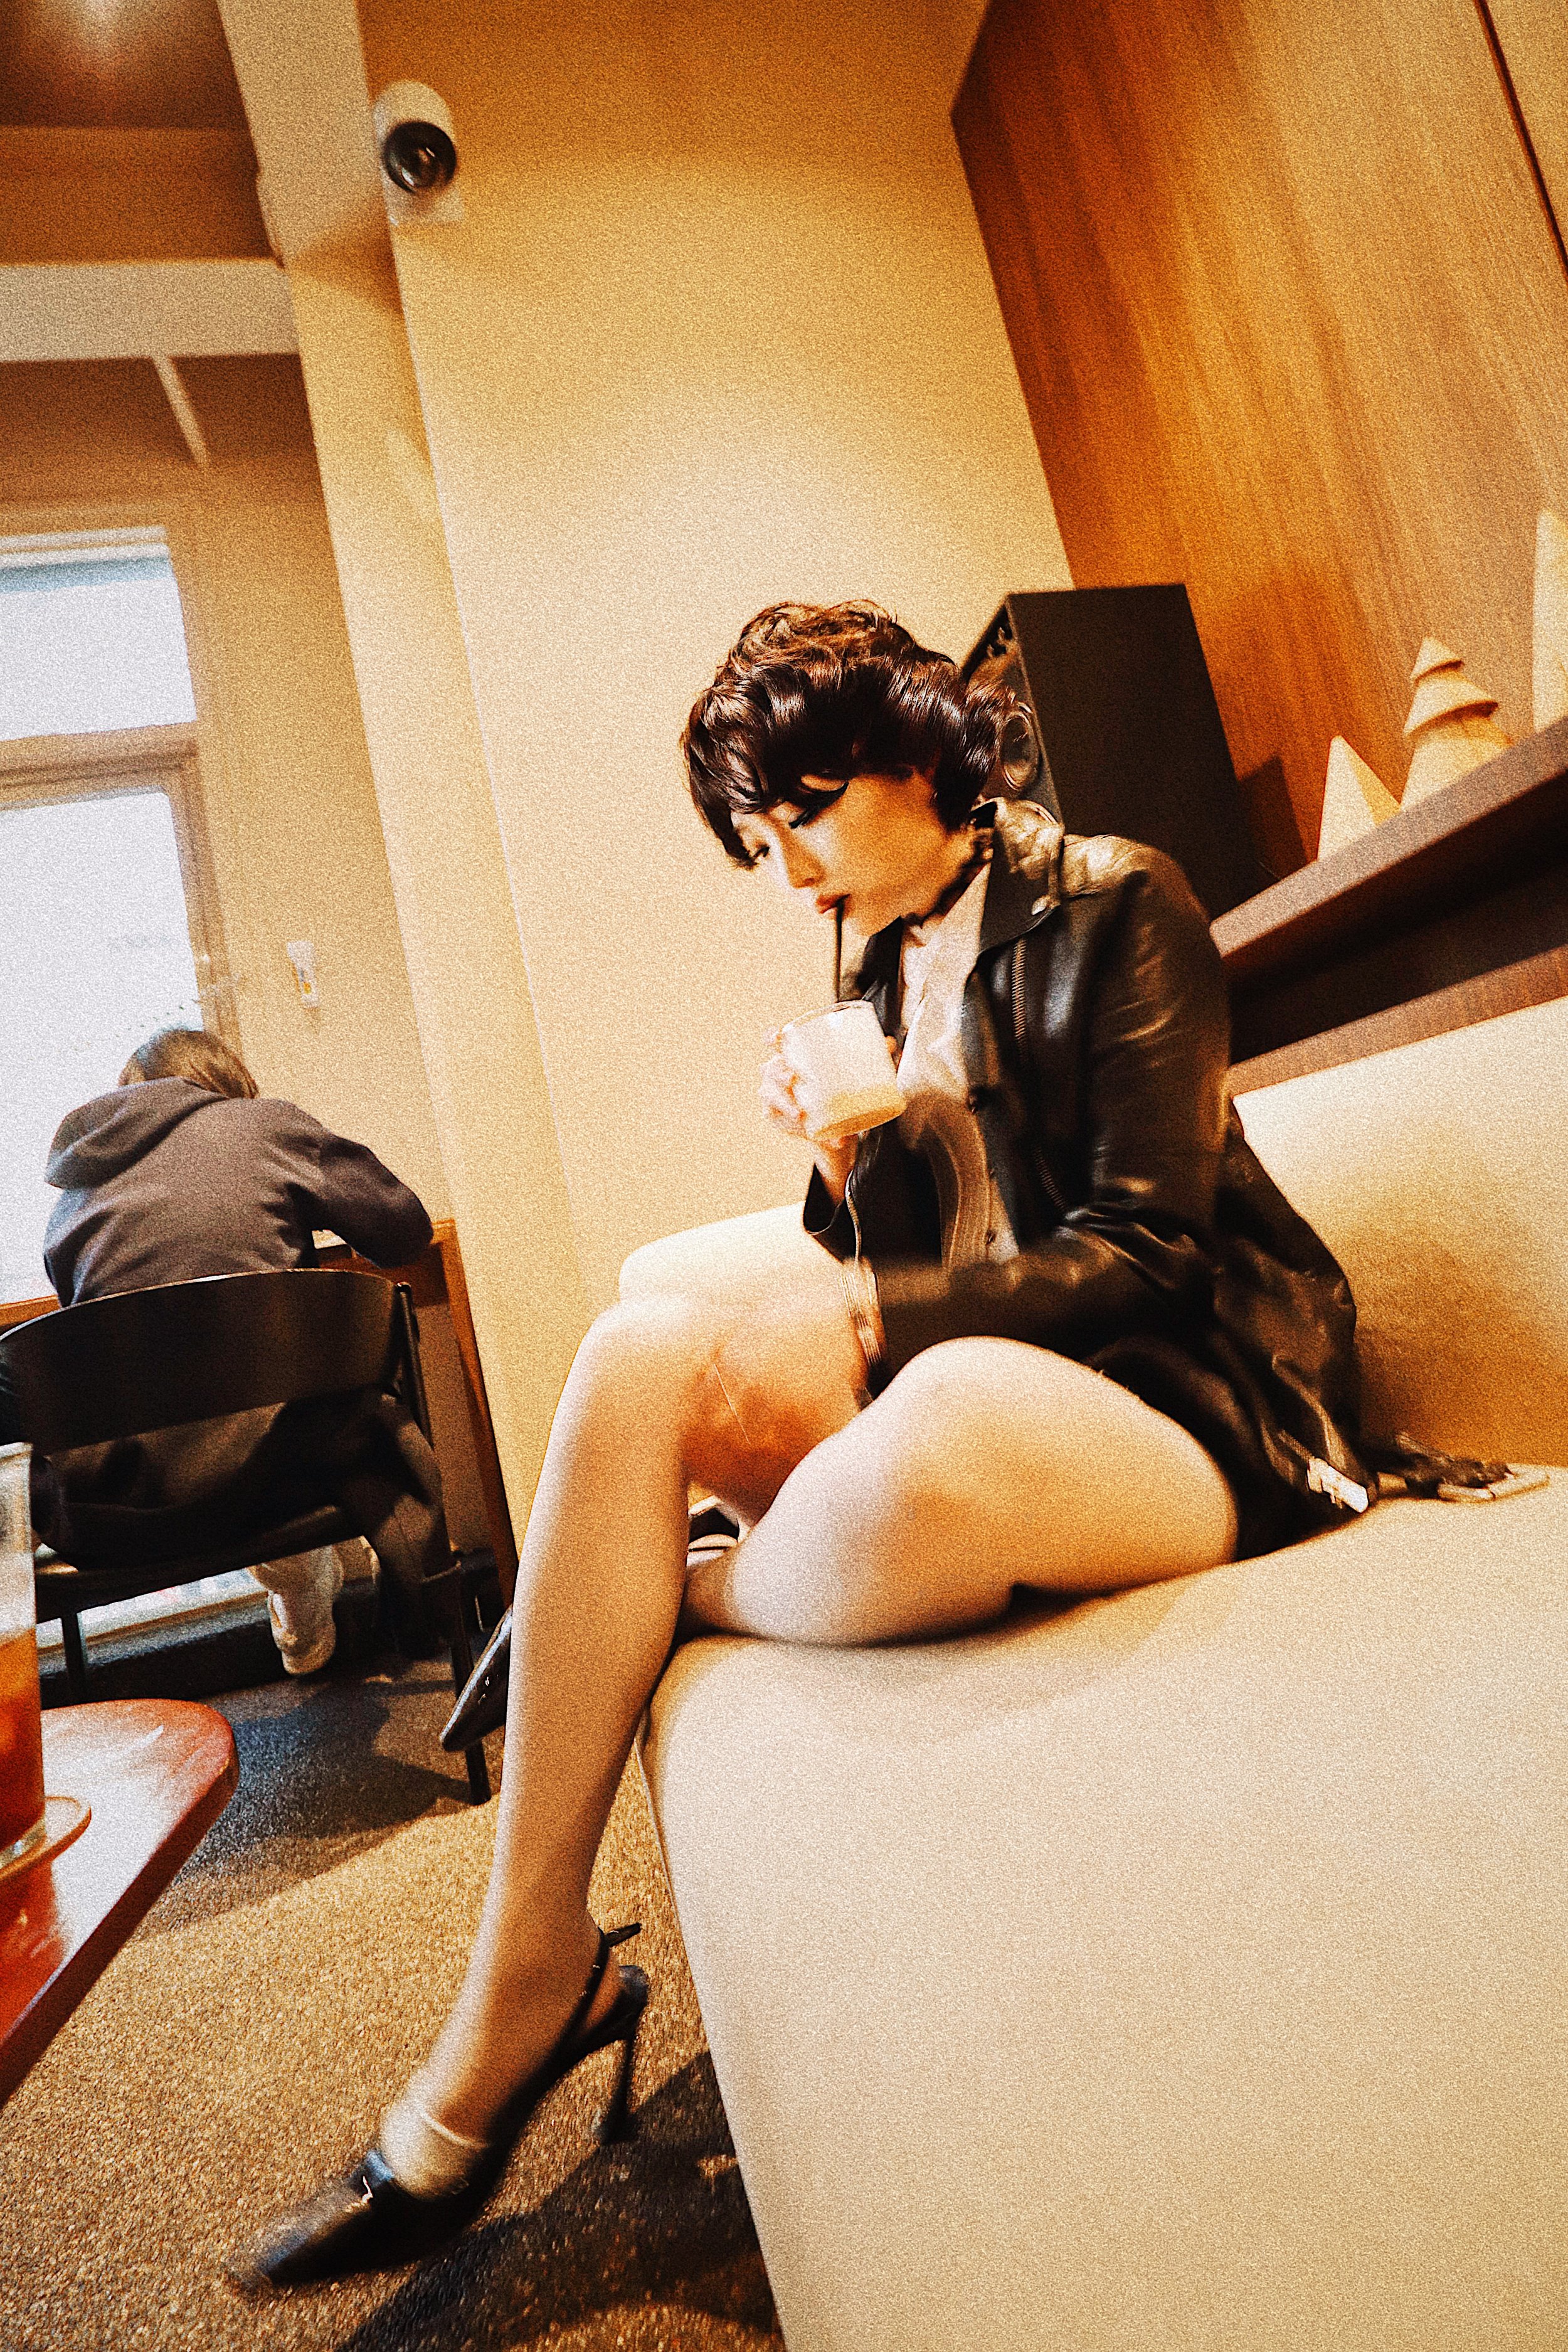
No flash. No speedlight. Just camera, lens, and the light already in the room.
Canon EOS 6D Mark II | EF 16-35mm f/4L IS USM | 16mm | f/8 | 1/25s | ISO 1000.
Now here's the counterexample — and it's just as deliberate as the flash shot.
Same café environment, another model, same kinda moment. But the intention was completely different — and the settings set it up.
The goal here was mood. A romantic painting quality. Something that looked like Vermeer stumbled into a Seoul café and decided to shoot an editorial. Soft focus was not only acceptable but desirable — the slight softness at 1/25s adds to the dreaminess rather than fighting it. The image didn’t need to be sharp. It needed to feel like something.
The window up and to camera left was doing all the heavy lifting — a large pane of diffused daylight acting as a giant softbox, wrapping directional sidelight across her face and creating a gentle shadow fall on the opposite side. That is textbook studio portrait lighting. Rembrandt lighting (almost), if you want to name it. Except there’s no studio, no modifier, no stand. Just a Seoul café window on a winter afternoon doing what good windows do.
f/8 instead of f/16 — aperture opened up to drink in that window light. Shutter dragged to 1/25s — slow enough to let the ambient exposure build properly, with the understanding that the subject was still enough for it to work. ISO at 1000 — sensor sensitivity pushed to meet the available light halfway. No flash fired. No speedlight on the hotshoe. Because a speedlight would have killed it. The moment you introduce a strobe into this scene you’re fighting the window — two competing light sources, two shadow directions, the filmic warmth replaced by the clinical correctness of a properly exposed flash portrait. The decision not to use flash here was just as deliberate as the decision to use it in every other shot in this article. The window was already a softbox. The slow shutter was already painting with available light. The correct move was to recognize what the room was offering, set the camera to receive it, and get out of the way.
That's the skill nobody talks about: knowing when the light has already solved the problem for you. A photographer who reaches for the flash in this situation — because they've learned to rely on it, because it feels like the professional thing to do — ruins the shot. The window was a softbox. The slow shutter let it breathe. The grain at ISO 1000 isn't a flaw — it's texture, and it belongs to the image.
This is what The Field actually produces: not a photographer who always uses flash, and not one who always avoids it. A photographer who reads the light in front of them and makes an active decision.
This is what understanding your camera actually looks like.
The Holy Trinity
Every photograph is the result of three variables working together: shutter speed, aperture, and ISO. Change one, and the other two have to compensate. This isn't a creative philosophy — it's physics. The camera is managing light, and these three controls are the only levers it has.
Most photographers learn these as separate concepts. Shutter is for motion. Aperture is for depth-of-field. ISO is for low light. That's not wrong, but it's incomplete in a way that will keep you stuck.
Here's what actually matters: they're a single system. Pulling one lever moves the others. Once you feel that relationship in your hands — not just understand it intellectually, but actually feel it while shooting — everything else in photography becomes a variation on the same problem.
ISO is where the system starts. Before shutter and aperture do anything, ISO sets the sensitivity of your sensor to light — the baseline condition under which everything else operates. High ISO means the sensor is more sensitive, which lets you shoot in darker conditions. Low ISO means the sensor is less sensitive, which requires more light but produces cleaner, sharper images. The cost of pushing ISO high is grain — called 노이즈 (noijeu / noise) in Korean photography communities — which degrades image quality. Think of ISO as setting the table: once you've decided how sensitive your sensor is going to be, shutter and aperture have to work within those terms.
Shutter speed and aperture are the primary pairing — the two controls that work in direct relationship with each other to manage how much light actually hits that sensor. Change one, and the other has to compensate.
Shutter speed controls how long the sensor is exposed to light. Fast shutter freezes motion. Slow shutter blurs it. But shutter speed also has a hard ceiling when you're working with flash — more on that in a moment.
Aperture is the iris inside your lens — the other half of the shutter pairing. It does two things simultaneously that most beginners never connect: it controls how much light enters the camera, and it controls depth-of-field — how much of your image is in sharp focus versus blurred background. A wide aperture (low f-number — f/1.8, f/2.8) lets in more light and produces that blurred background look everyone chases. A narrow aperture (high f-number — f/11, f/16) keeps everything in focus and lets in less light. Same lever, two effects, both happening simultaneously every time you adjust it.
Here's the thing: your eyes do exactly this. Walk into bright sunlight, your iris closes down to a pinhole to protect the retina from overexposure. That's why everything looks so sharp and hyper-defined on a brilliantly clear day — your iris is at its narrowest, and a narrow opening increases the zone of sharp focus, just as a narrow aperture on your lens. It's also why people squint when they're trying to see something better. Squinting is just your eyelids helping your iris create a smaller aperture, sharpening the image. The camera's iris and your eye's iris are solving exactly the same optical problem with exactly the same mechanism. Once you understand that, the f-stop scale stops being an abstraction and starts being something you've been living with your entire life.
The rooftop moment fails because auto mode is making all three decisions for you, optimizing for a correct exposure rather than the exposure you want. When the light is doing something complex — directional, mixed, dramatic — the camera's guess is almost always wrong. Not because it's a bad camera. Because it's guessing.
Why Flash Changes Everything — And Why Nobody Wants to Admit They Don't Understand It
Here's the dirty secret of the photography world: flash is the one part of the exposure equation where even experienced photographers carry the most doubt. Shutter speed, aperture, ISO — these feel learnable, logical, something you can master with enough practice. Flash feels different. Mysterious. A fourth variable that doesn't quite obey the same rules, that produces unpredictable results, that can make a picture look worse instead of better when you get it wrong.
And so photographers quietly avoid it. They work around it. They develop elaborate justifications for why they don't need it.
You know the move. "I'm a natural light photographer."
It sounds principled. Romantic, even — the photographer and the available light, working with what the world provides, no artificial intervention. But spend any time in photography communities online or off and you'll notice: the phrase comes up suspiciously often in exactly the situations where flash would have solved the problem. The Fstoppers community put it bluntly: "Every time I hear a photographer state 'I'm a natural light photographer,' what I hear is 'I haven't learned to use my flash.'" That's harsh. It's also frequently true. Many photographers have genuinely great instincts for natural light — but their relationship with flash is flimsy, and when push comes to shove, they'd rather leave it out of the workflow than expose the gap.
The gap is real. Flash introduces a fourth variable into a system most photographers are still getting comfortable with. It has its own physics, its own relationship with aperture and shutter that operates differently from ambient light, its own failure modes. The first few times most people use a flash on-camera, the results are harsh, flat, and ugly — which confirms the suspicion that flash is for people who don't know what they're doing, and reinforces the retreat back to natural light.
Here's what actually happened: they used flash wrong. They put it on their camera and pointed it directly at someone's face, which is the lighting equivalent of shining a torch in someone's eyes and calling it portraiture. That's not flash — that's a mistake made with flash. Think of it like cooking with a habanero for the first time. The habanero is not the problem. It's one of the most complex, fruity, interesting chilis in existence — subtle when used correctly, transformative in the right dish. But the first time most people cook with one, they use too much, too early, with no feel for how the heat builds and compounds. The dish is inedible. The lesson they take from that experience is not "I need to learn more about chili heat." It's "habaneros are not for me." And they spend the next several years cooking with gochugaru and calling it bold. Flash is the habanero. The first result is almost always too much, too flat, too wrong — not because flash is bad, but because nobody told you how it actually works. The actual skill — balancing strobe with ambient light, controlling direction and power, understanding why aperture governs flash exposure while shutter governs ambient — is entirely learnable. And once you learn it, natural light stops being a philosophy and starts being one option among many.
Natural light photography has a ceiling. Not a quality ceiling — some of the best images ever made were shot in available light. A practical ceiling: you are at the mercy of whatever light exists. Flash breaks that ceiling. You bring your own light source. You decide where it goes, how strong it is, and how it relates to the ambient light already in the scene. Once you understand the shutter/aperture relationship, flash becomes its most logical extension: aperture controls flash exposure, shutter controls ambient exposure, and you can adjust one without affecting the other. That's a superpower — once you stop being afraid of it.
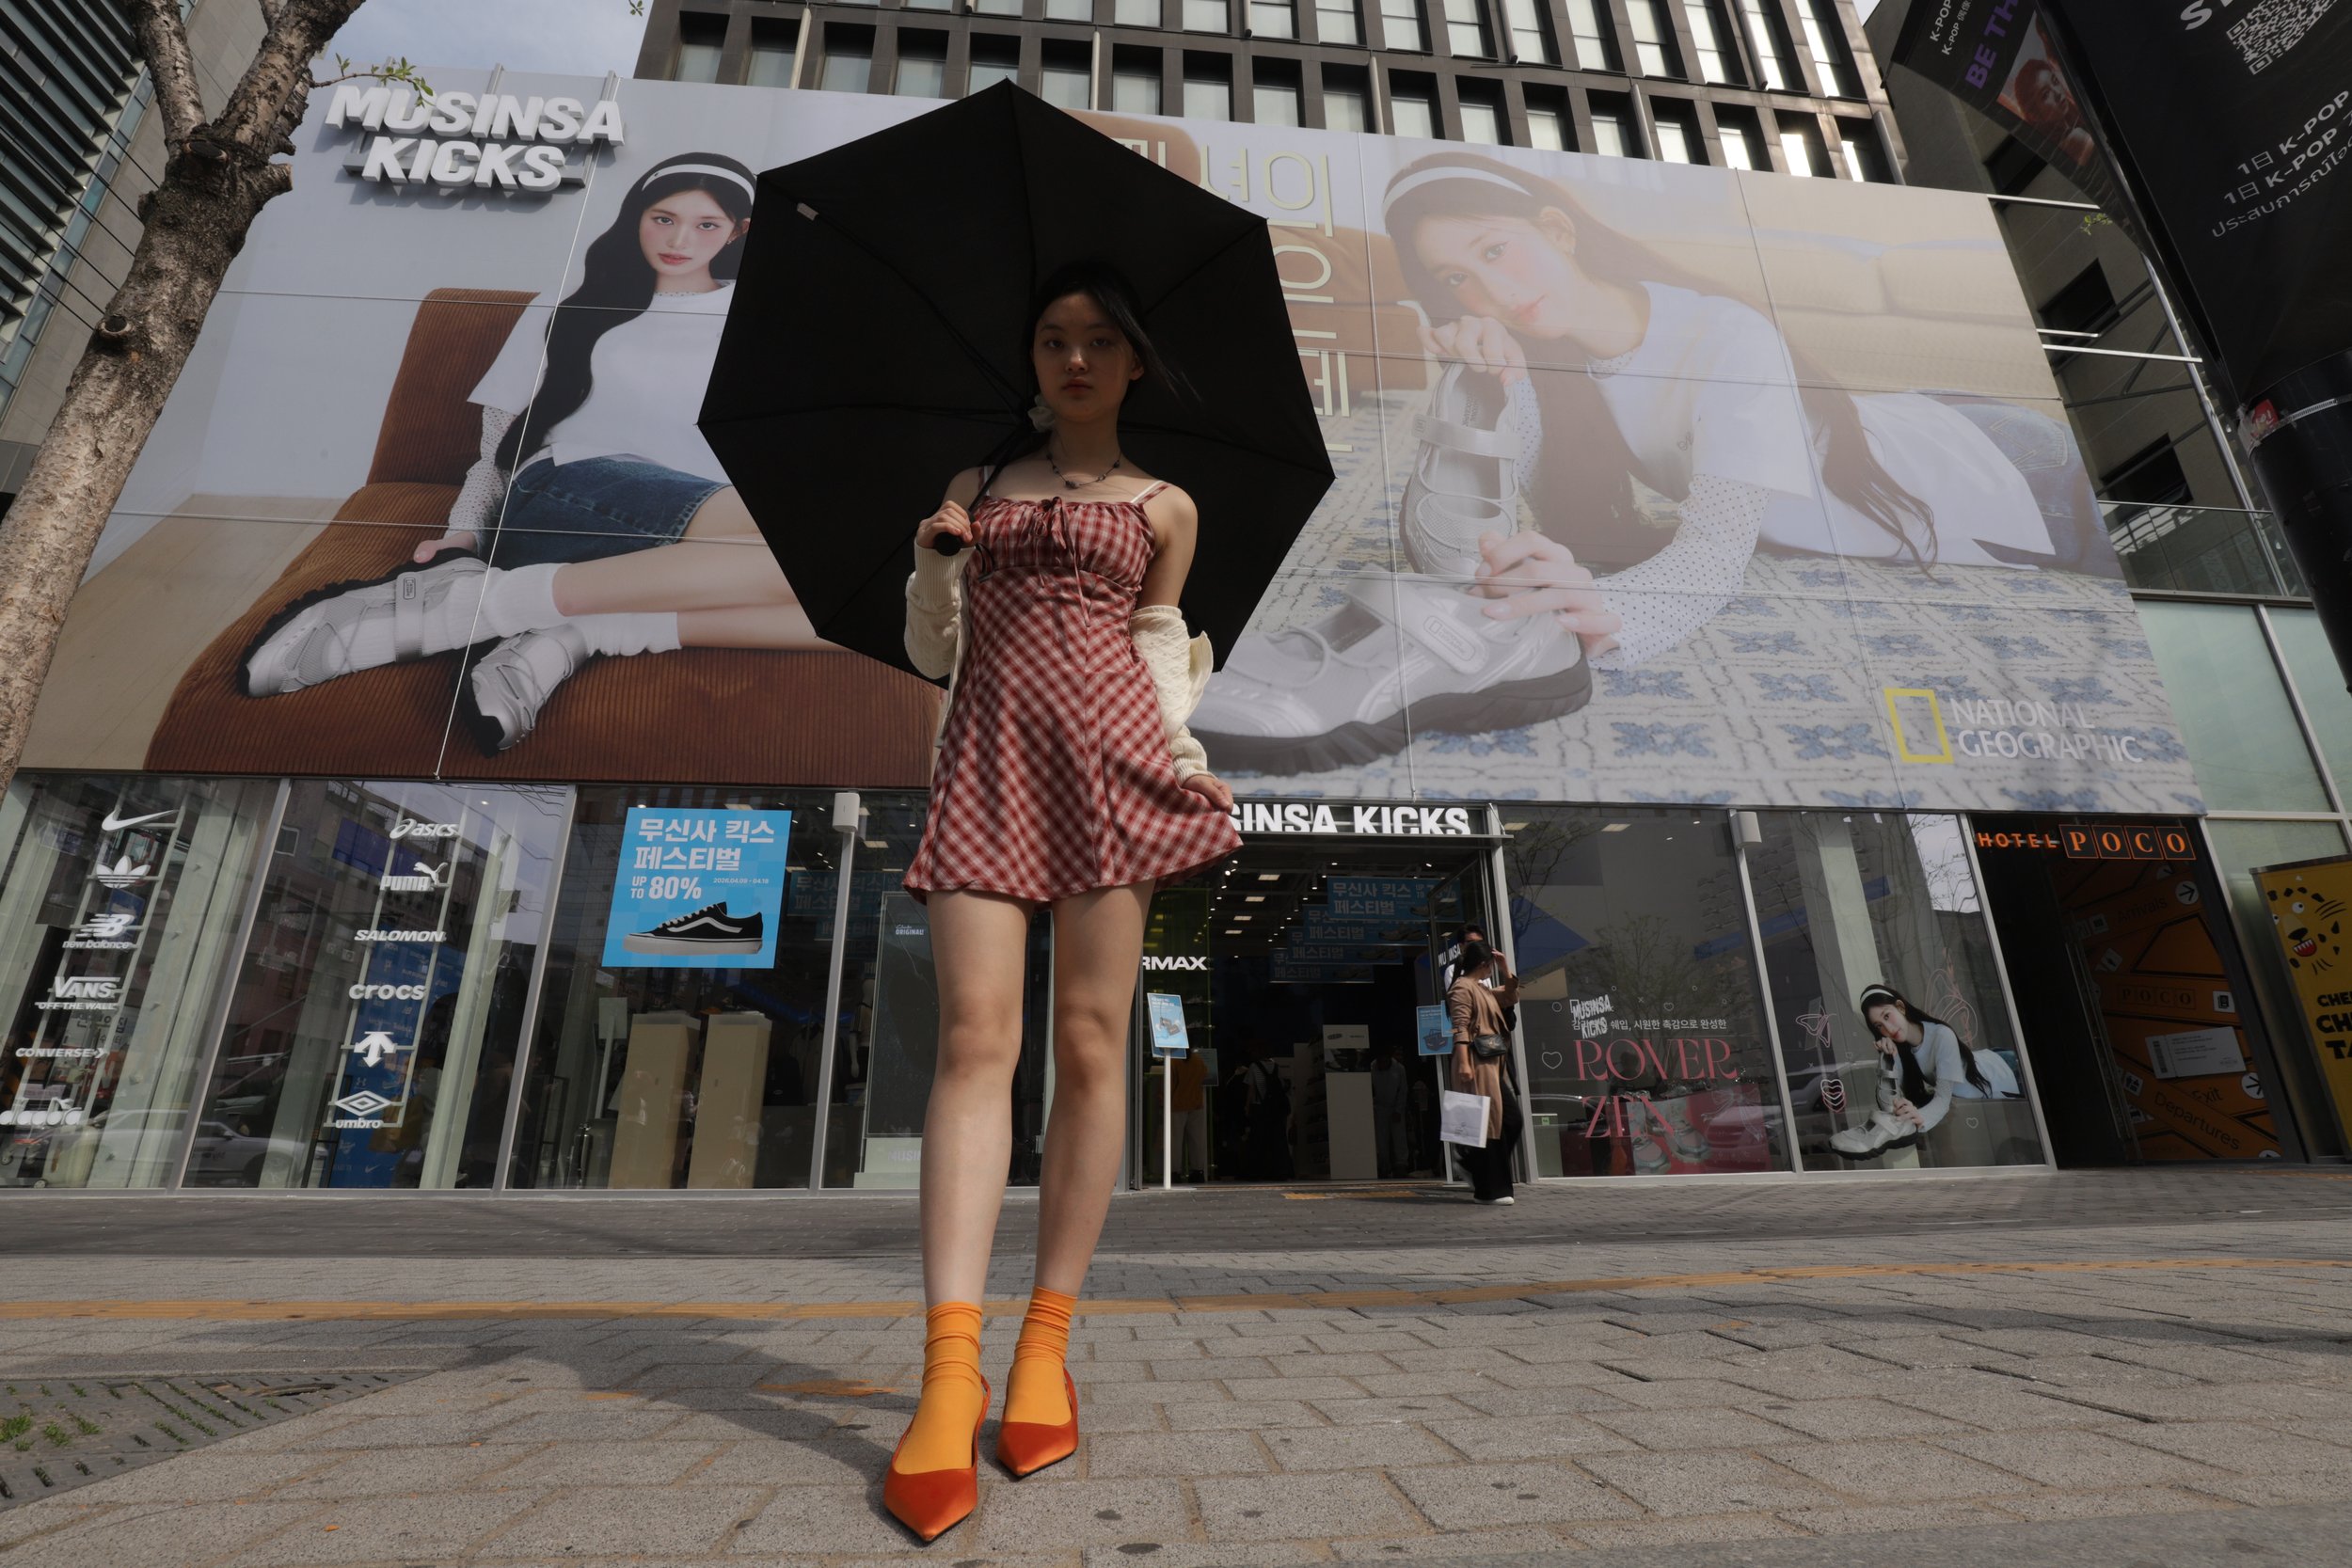
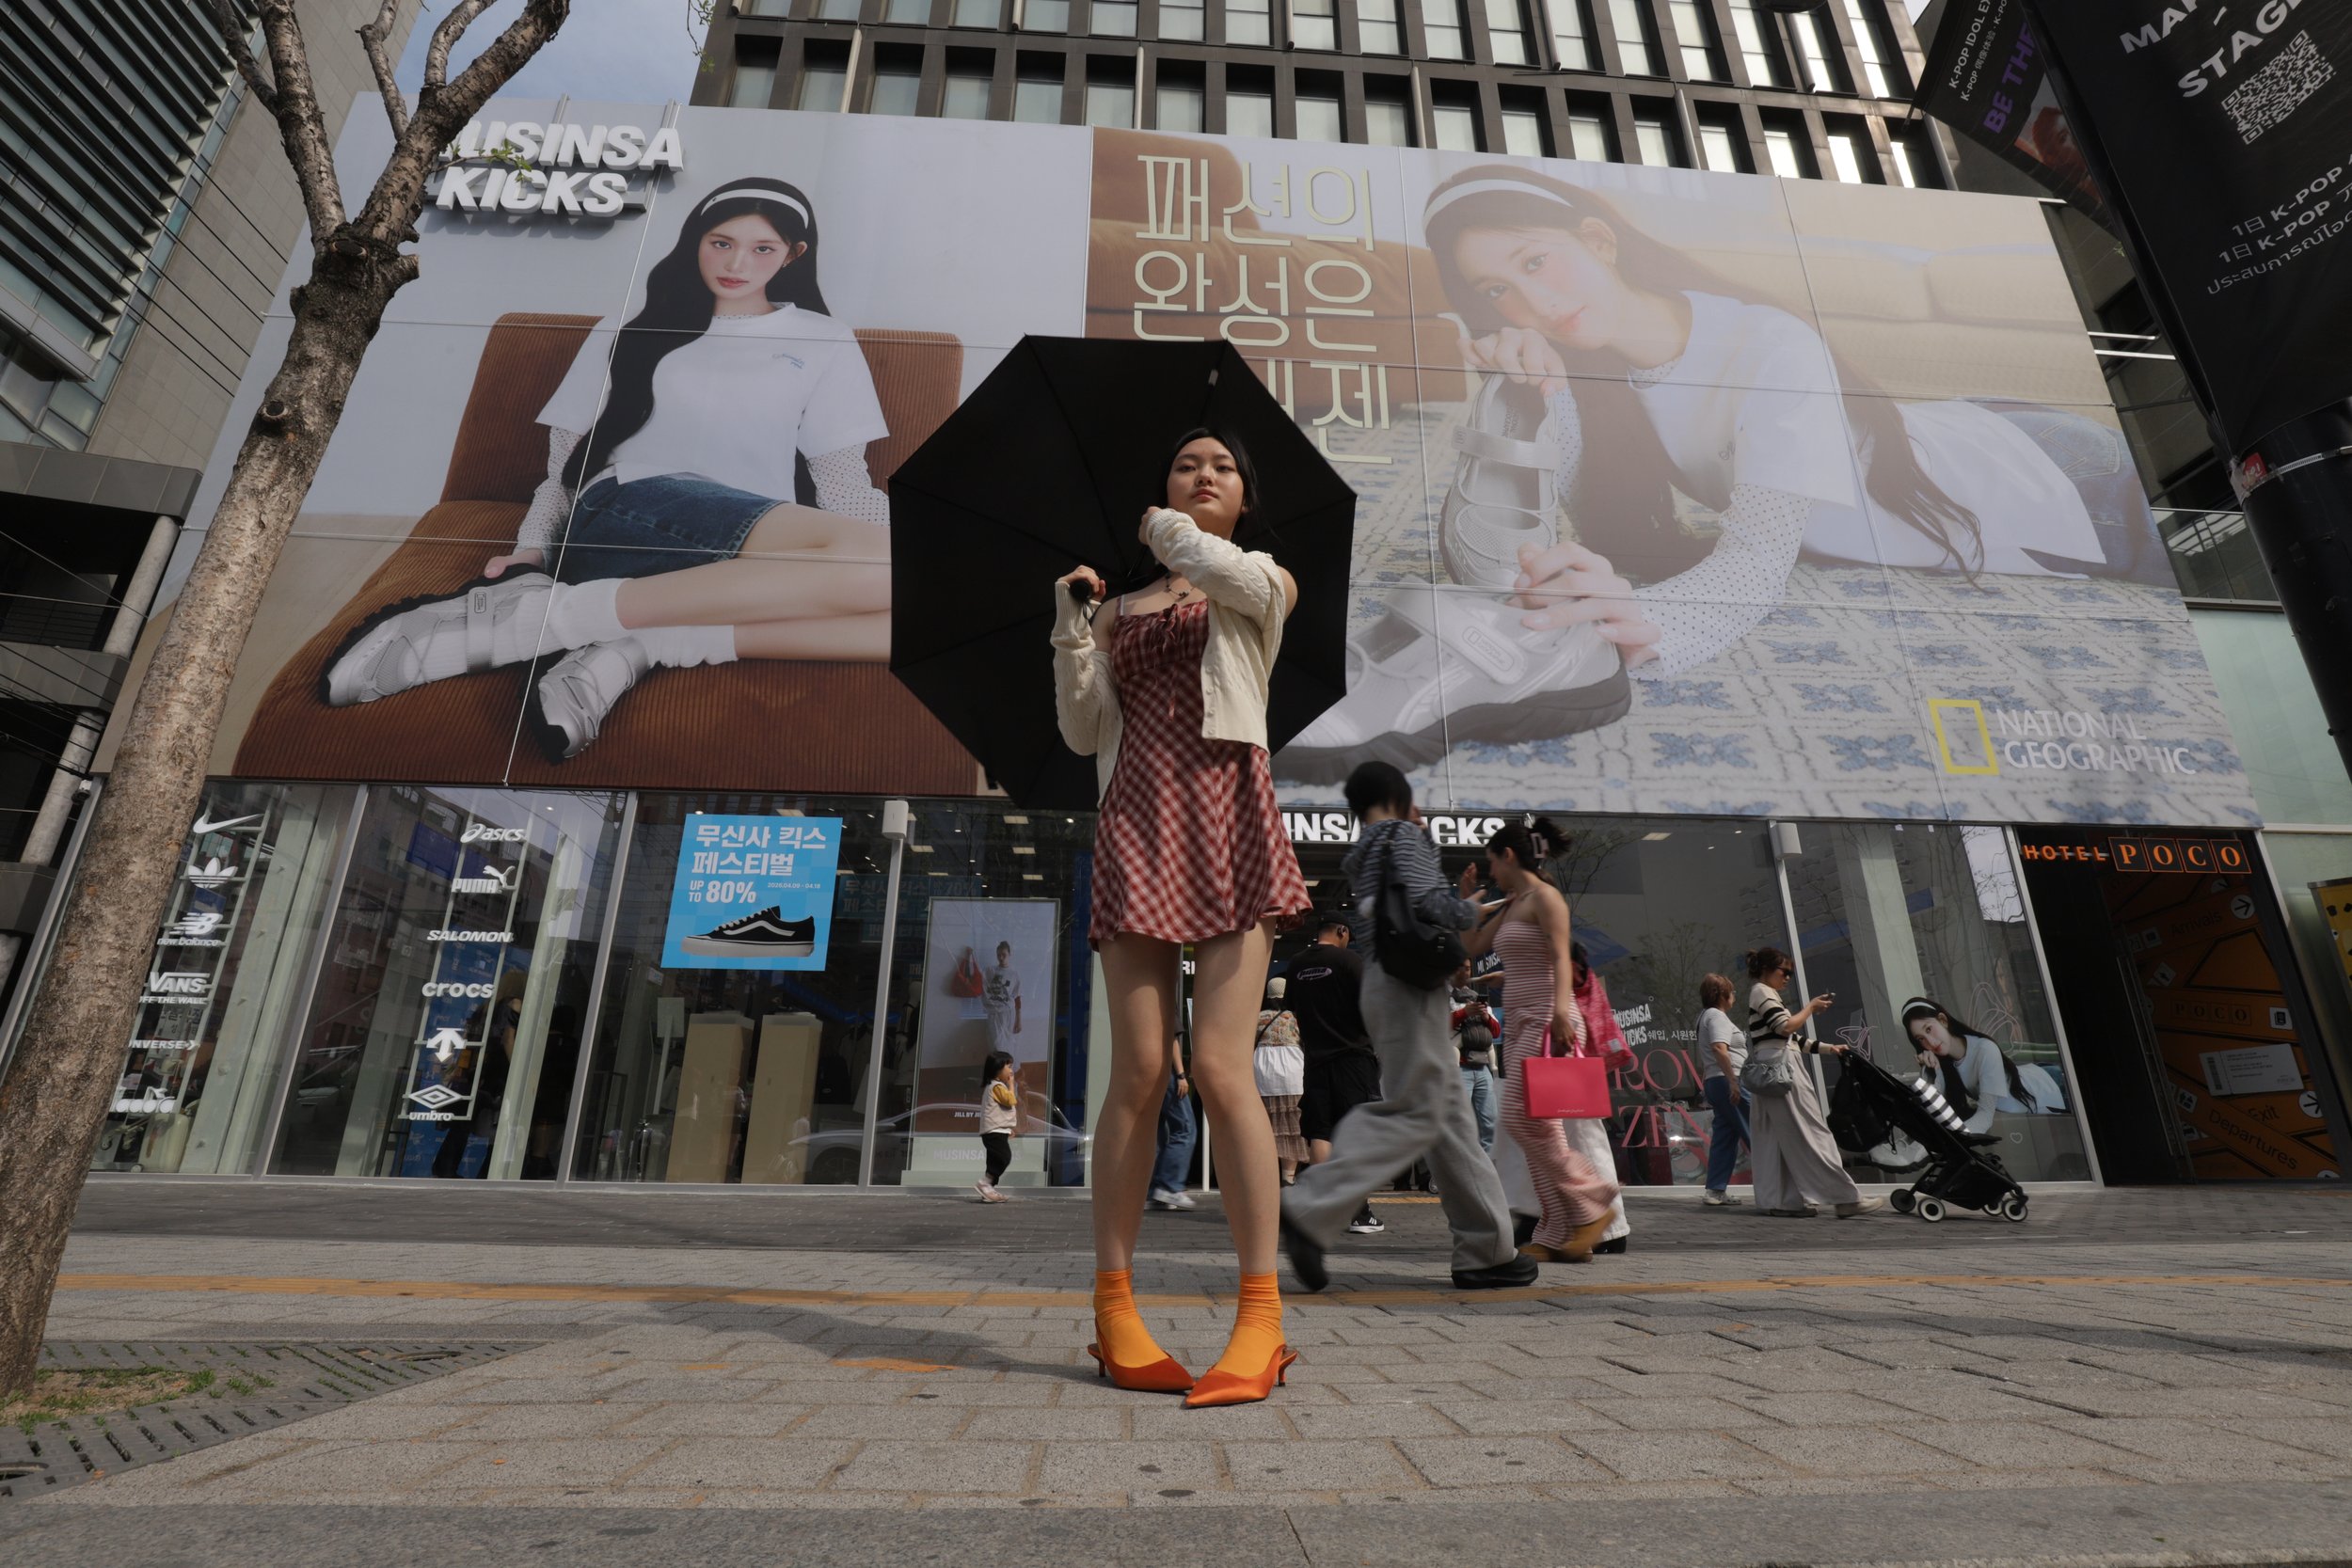
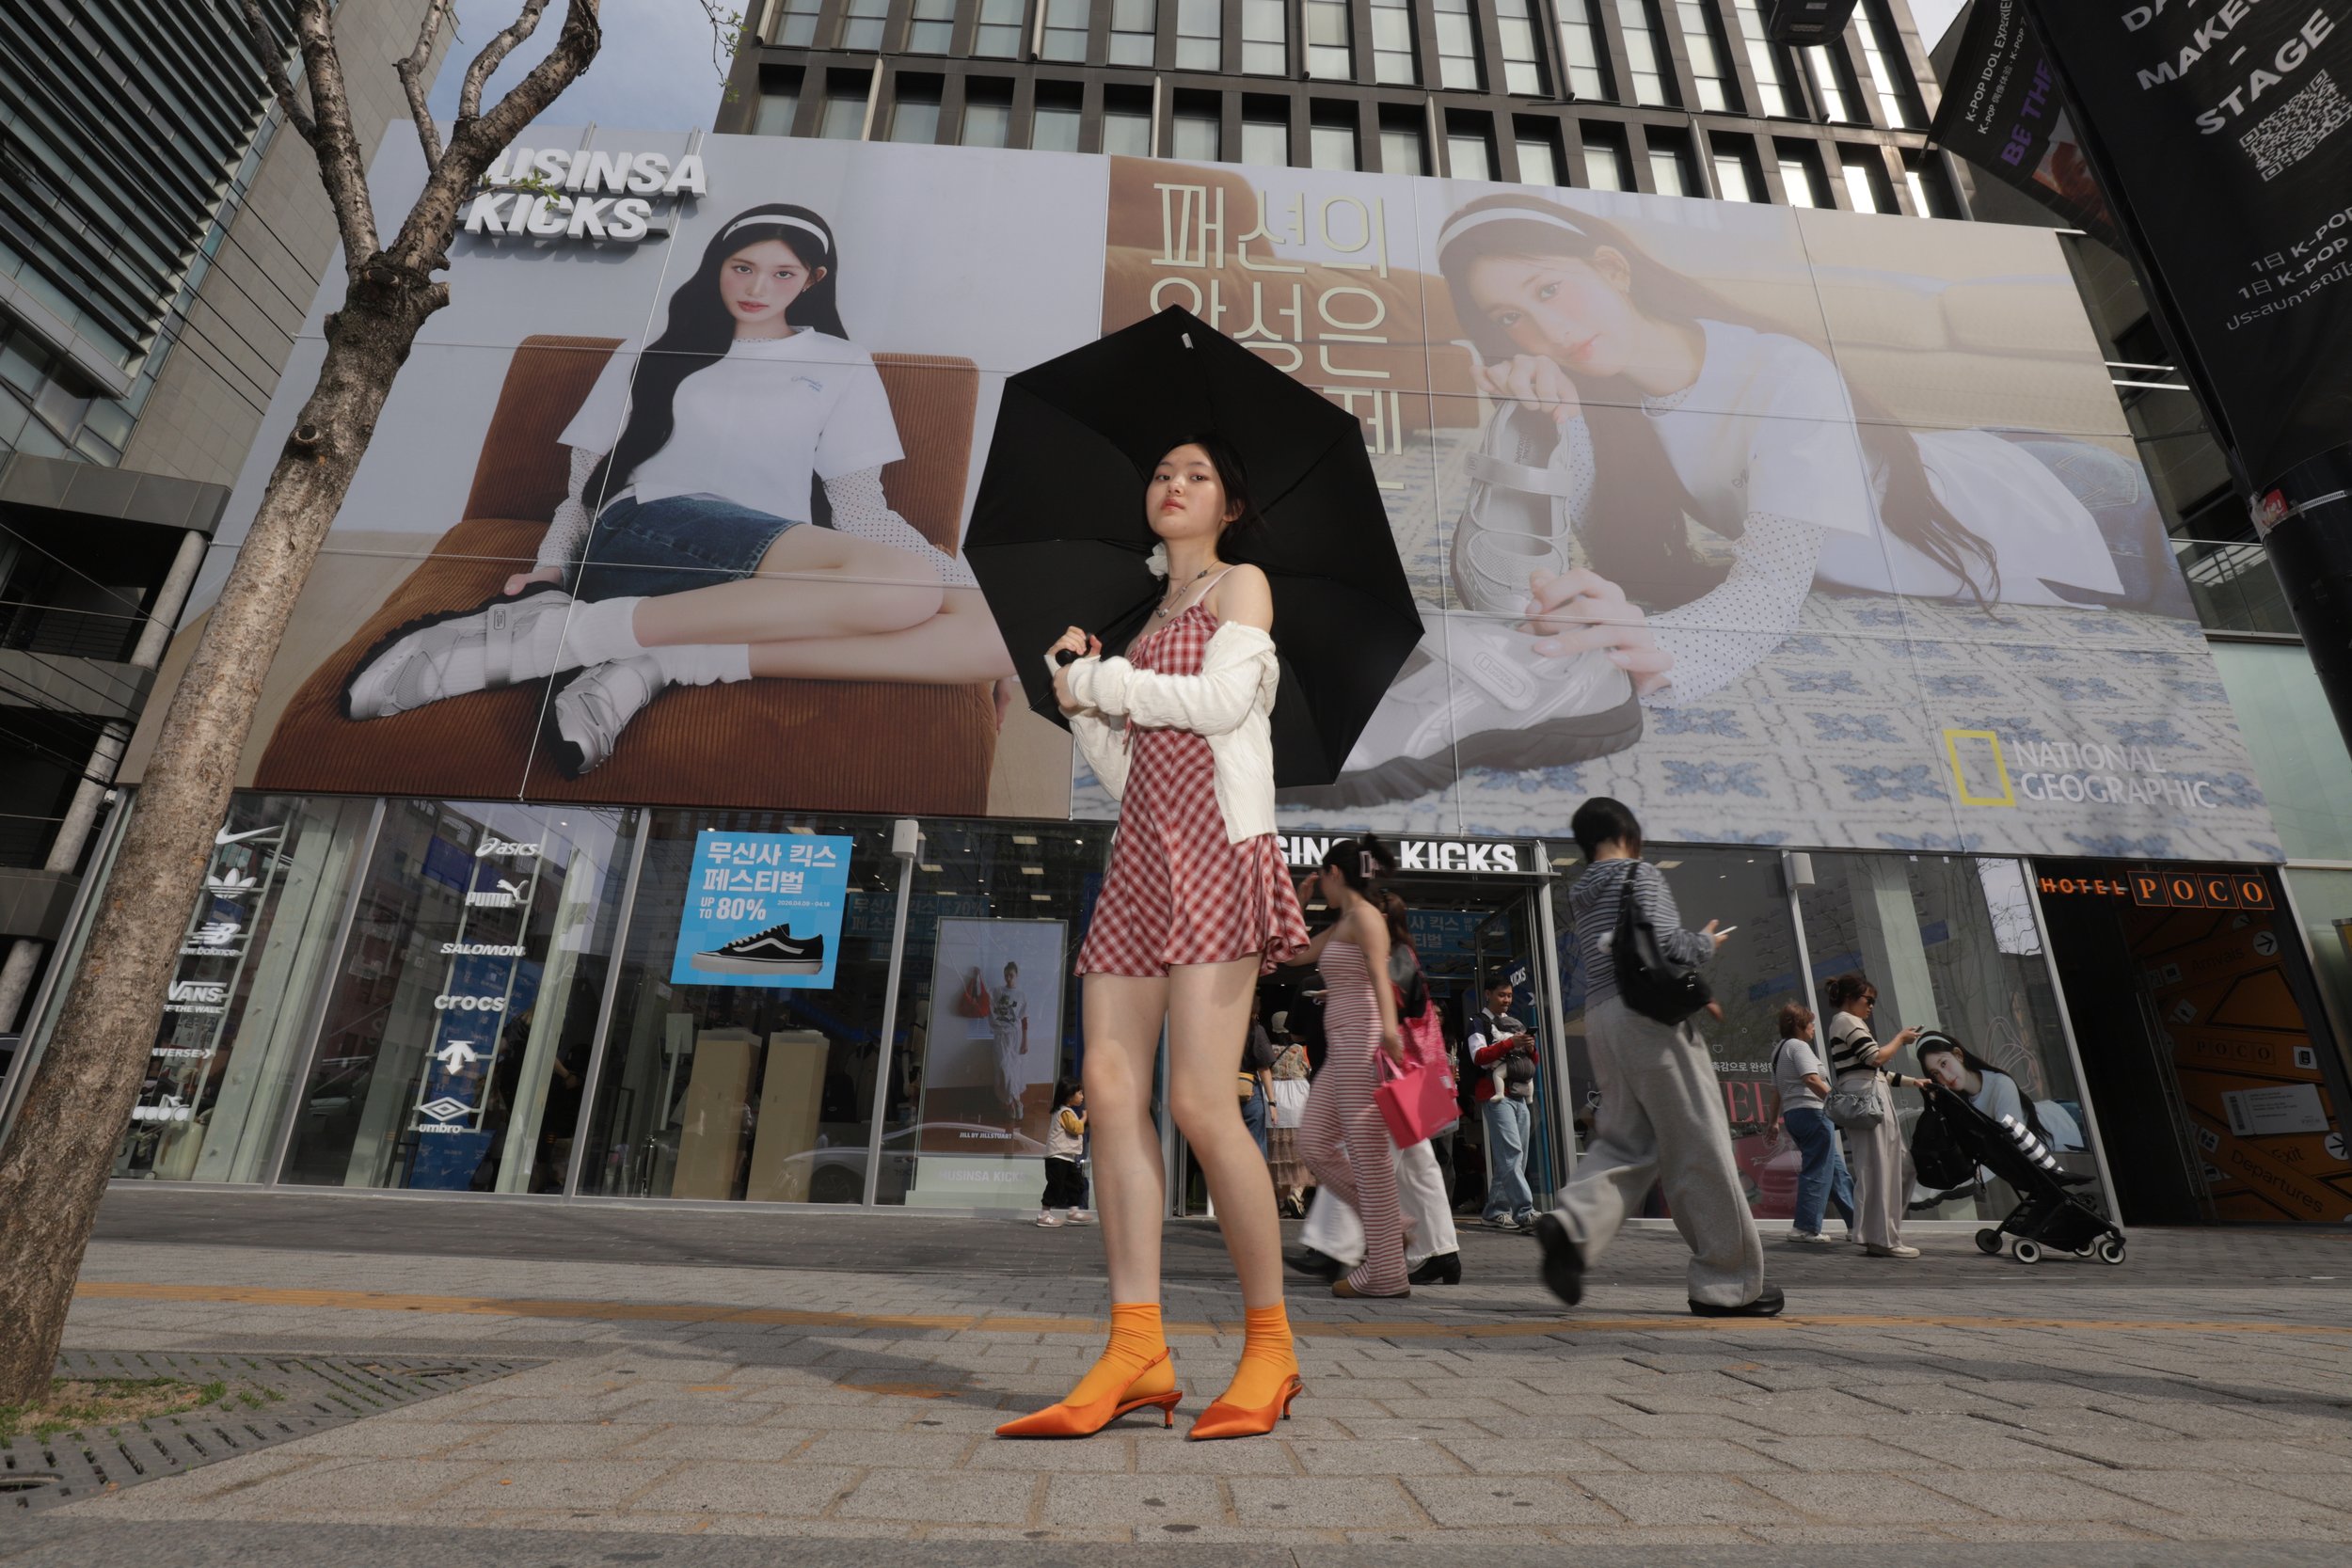
Without fill flash: the camera exposed correctly for the bright background. Model Eunmyung (@08.7.30)’s face reads as shadow. The umbrella did exactly what umbrellas do — and the camera had no answer for it.
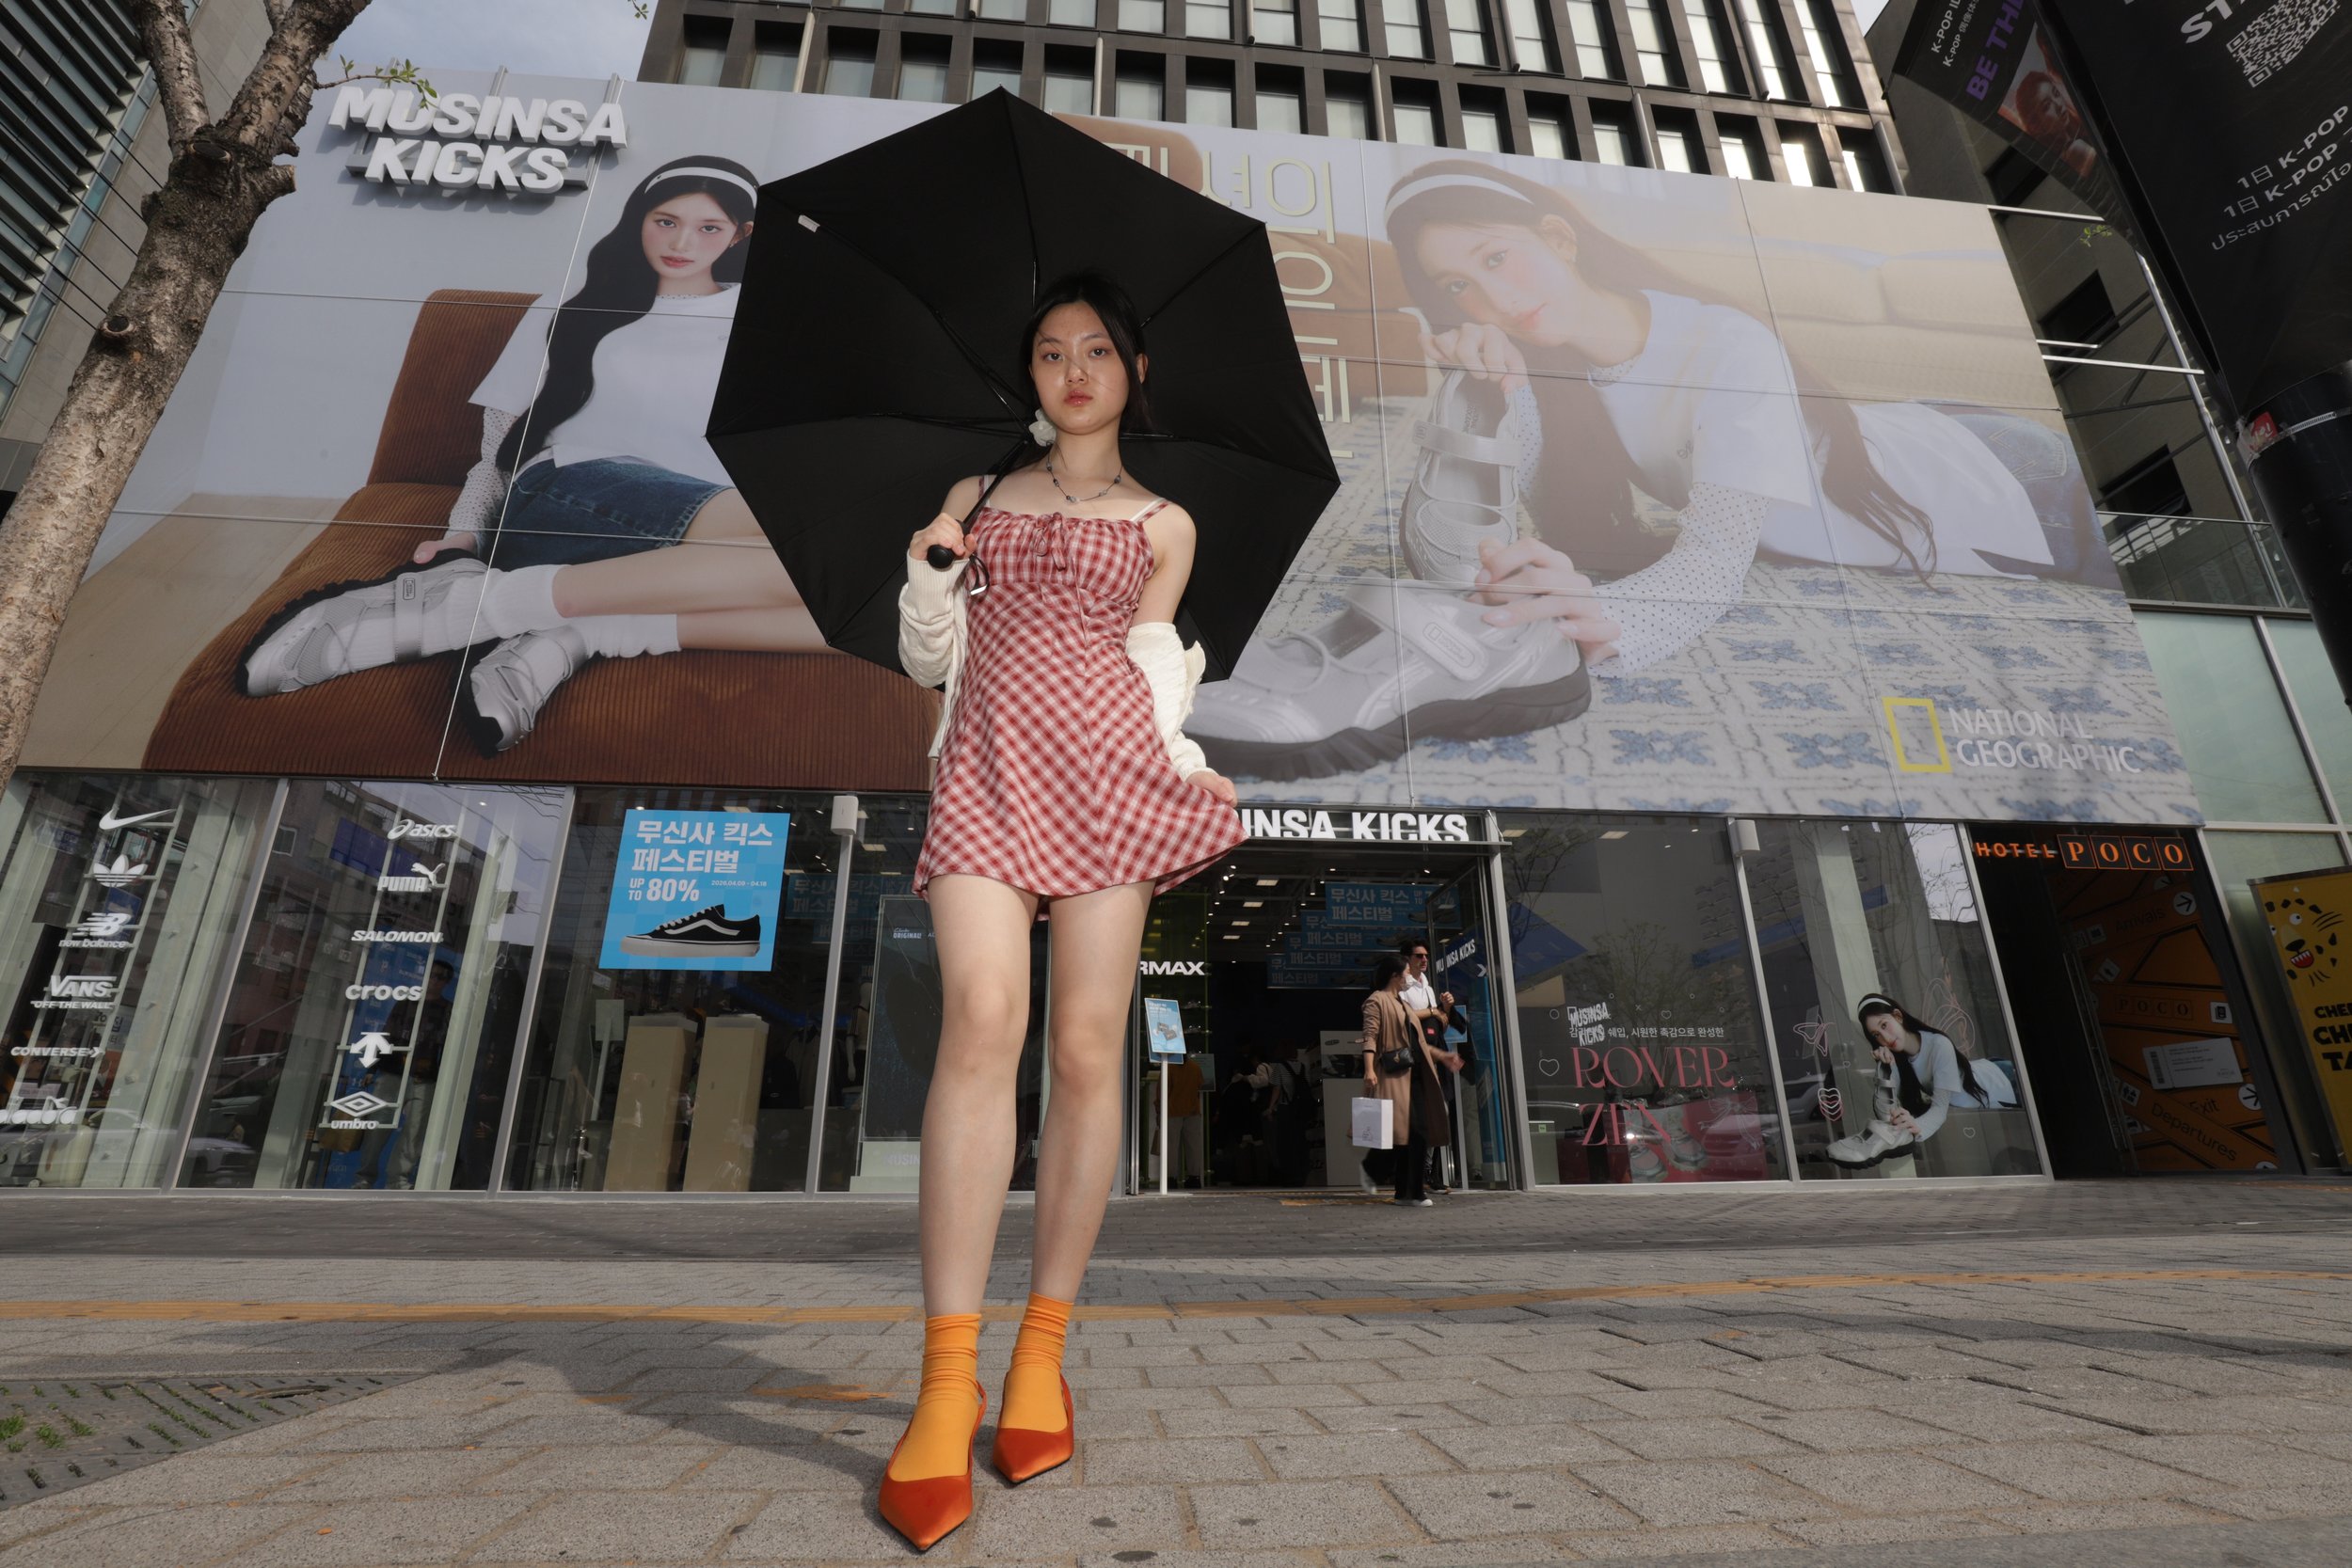
With fill flash: same scene, same ambient exposure, same umbrella. One small strobe balanced what the umbrella took away. The background holds, the face is saved. That's fill flash — not just a creative choice, but also, a technical solution.
Look carefully — the overall exposure barely changed between these two. That's the point. Fill flash isn't about making a picture brighter. It's about solving a specific shadow problem the camera can't fix on its own. Notably, flash power decreases exponentially with distance. Energy in physics is counterintuitive; because when you double the distance, you have to SQUARE the power to make up for it, to keep the same brightness. That’s why the building behind her isn’t affected by flash at all. And it’s actually why the ambient ligh exposure around her looks the same — because they are the same. 1/60s at f16 at ISO 125. All that is locked in under Manual mode on the camera, while I fired (I think — it’s not recorded in the camera) at full power, since a lot of flash juice is required to punch through the relatively closed aperture ring at f16.
But the harsh and total shadow example may seem extreme. Because one might note, “Hey, the flash still seems flashy. It’s too much and looks unnatural.”
Without fill flash: direct sunlight hits her face correctly — technically exposed, but her eyes are harsh and contrasty. She looks like a demon. Those shadows under the nose, chin, and eyes are doing real damage. The camera has no complaint. But your eye does.
In this example, I didn’t want thw flash exposure to take over the entire face exposure, so I turned down the flash power manually by dialing it down a couple clicks to put the flash exposure juuuuuust under the amount to fully light her face like in the first picture of this series, but enough to fill her shadows and leave the sun-made highlights the natural highlights.
With fill flash: same sunlight, same settings, one small strobe added. The shadows even out, the face opens up — and it doesn't look "flashy" at all. Because fill flash done right is pretty much invisible to the casual glance. It’s just a tiny flick of light designed to bring up the shadows. Fairly invisibly. That's the goal.
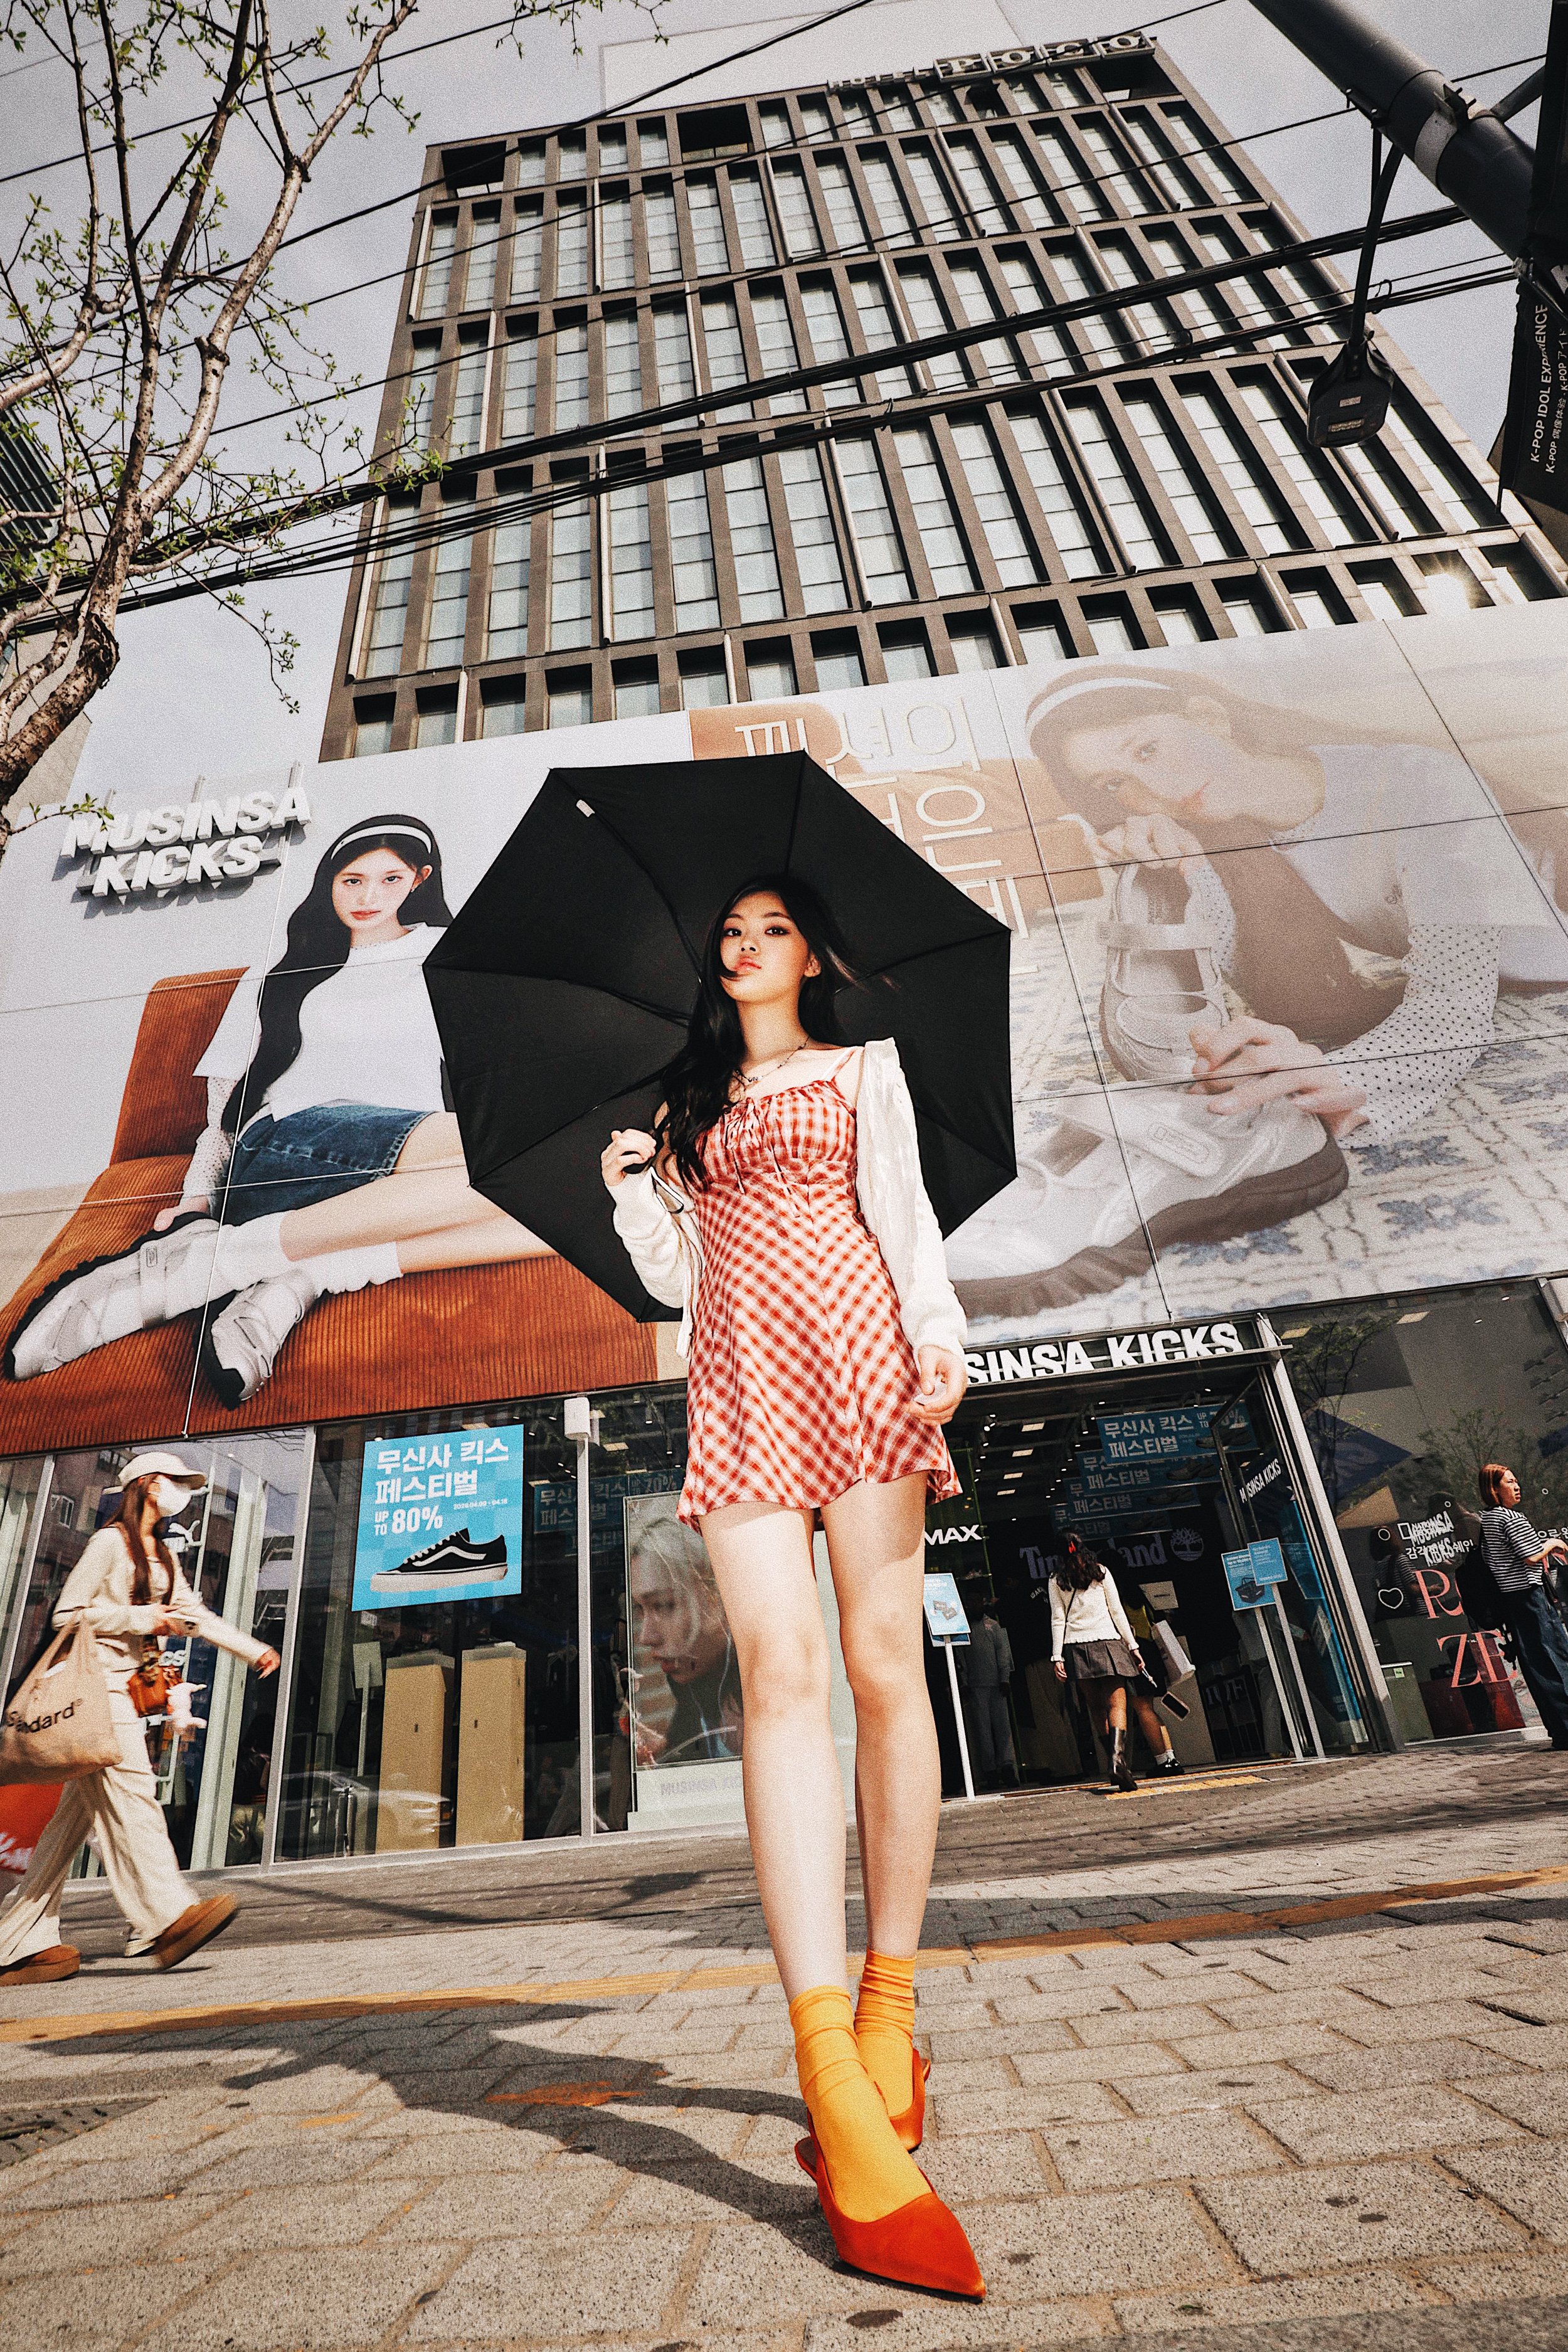
This became the final shot, after a lot of post-processing and stylization with the addition of digital makeup and grain to even out said digital makeup — added to a shot chosen partially because it’s a vertical shot that allows the wide-angle lens’s barrel distortion to elongate this 158cm (5’6”)-tall model into a towering figure that creates a triangle with the advertising image faces behind her, and also has women in the background milling about (2 of them in fashionable mode).
The Equipment Question — and Why It Doesn't Matter As Much As It Used To
There's a reason Vogue editorials from the 1980s and 90s had a look that felt almost otherworldly — that sense of expensive, controlled perfection that made them feel utterly different from any photograph an ordinary person could take. Part of it was styling, location, and talent. But a big part of it was simply this: bringing studio-quality light outdoors used to be extraordinarily difficult and expensive. A battery-powered studio strobe capable of working in daylight was a piece of German engineering that cost several thousand dollars. A ring light was a specialist item that lived in rental houses. When a photographer successfully dragged that setup onto a rooftop or into a back alley, the results looked like nothing else precisely because almost nobody else could do it — even if they had the money, which most didn't.
That world ended quietly about fifteen years ago, when Chinese manufacturers — led by companies like Godox — figured out how to produce the same basic technology at a fraction of the cost. The Godox AD360 II is a 360 watt-second battery-powered location strobe — the kind of unit that would have cost you $2,000-3,000 from a European brand like Profoto in its heyday. Today it runs around $300-400. The Profoto equivalent, the B10, still retails for around $1,500-1,700.
What professionals were actually paying for with that Profoto price tag wasn't just power or build quality — it was consistency. A Profoto unit fires at exactly the same power output every single time you press the shutter. No variation, no drift, no surprise. When you're metering for a $10,000 commercial job and every frame has to be identical, that predictability is worth real money. The assumption when Godox started undercutting the market was that the Chinese equipment would be the thing it always was assumed to be: cheaper because it was worse — inconsistent pops, unreliable triggers, equipment you'd buy five of knowing one would be broken. That was a fair assumption in the early days. It isn't anymore. Watch any serious gear review on YouTube from the last three or four years and you'll hear the same thing said in different ways: the Godox consistency problem has been largely solved. The gap between what a Profoto fires and what a Godox fires, at a given power setting, is now close enough that most working photographers can't justify the price difference. Some argue the Godox has actually surpassed its German competition in certain categories. The market has responded accordingly — Godox is now standard equipment for a generation of serious photographers who simply never needed to spend Profoto money.
That democratization of consistent, controllable location lighting happened at exactly the same moment Instagram emerged as a major outlet for serious photographic work. Better gear, cheaper. Better distribution platform, free. The technical possibilities of photography expanded while the commercial and cultural appetite for high-quality images exploded — and the result is that the standard of what a serious photograph looks like has risen dramatically across the board. The gap between a professional image and an amateur one used to be partly explained by equipment access. That excuse is gone. What remains is knowledge.
What this means in practical terms: the look that used to require a Vogue budget is now available to anyone willing to learn how to use the equipment. The equipment is no longer the barrier. The knowledge is. Which is exactly what The Field addresses.
The Sunday Photo Walk Problem
There is nothing wrong with a Sunday photo walk. A group of people who love photography, wandering through a neighborhood together, shooting what catches their eye, comparing results over coffee afterward — that is a genuinely good thing. It builds community. It keeps the habit alive. It gets you out of the apartment with a camera in your hand, which is always better than not.
But it will not make you a better photographer. Not in any systematic way. And here’s why.
A photo walk is a democracy of skill. Everyone who shows up is roughly at the same level — enthusiasts, hobbyists, people who love photography and shoot on weekends. The knowledge in the group is distributed horizontally. Which means when someone does something wrong — when they’re blowing highlights because they don’t understand exposure compensation, or avoiding flash because they don’t understand sync speed, or wondering why their portraits look flat but not knowing what to change — there is usually nobody around to say: here is exactly what is happening, here is why, here is what to do instead. The conversation stays at the level of the group. Problems get admired rather than solved. Techniques get reinforced rather than corrected.
This is not a criticism of photo walk communities. It’s a structural observation. Hobbyists leading hobbyists is a great way to share enthusiasm. It is not a great way to transfer skill.
Skill transfer requires a different dynamic: someone who has already made all the mistakes, internalized what they mean, and can recognize them in real time in someone else’s work. Someone who can watch you shoot and say — before you’ve even checked the back of the camera — that the image isn’t going to work and exactly why. That kind of feedback loop is what separates a class from a community, and it only exists when there’s a genuine gap in knowledge between the person teaching and the people learning.
After twenty years of shooting on Seoul’s streets, teaching photography at Hongik University and Myongji University, and credentialed press access to thirty-plus seasons of Seoul Fashion Week, that gap is not a small one. The Field is where it gets put to work.
What The Field Actually Is
The Field is a four-session photography course — four Sundays, four completely different shooting environments — designed to get you genuinely competent with a camera in one month. Not building slowly toward a payoff at the end. Something valuable in every session, from the first one. By the end of session one you'll have full command of your camera's core functions — shutter, aperture, ISO, depth-of-field — no longer guessing at settings or defaulting to auto. By session two you're outside with a flash, wrestling those functions in real street conditions, adjusting on the fly, learning to read light and respond to it. By session three you're shooting a working model in a controlled studio environment. By session four you're putting everything together simultaneously on the streets of Seongsu. The course works across any system — DSLR, mirrorless, micro 4/3, film. The physics don't change.
The techniques you learn here are not attached to specific locations or specific uses. You don't learn "how to shoot in a studio." You don't learn "how to shoot street fashion." You learn how light works, how your camera manages it, and how to control the relationship between them — which means you can apply those techniques anywhere, in any configuration, with any equipment you happen to have. Studio strobes outdoors. A single speedlight in a dark bar. Natural window light in a café. The knowledge transfers because the physics transfers.
Session one is the system — shutter, aperture, ISO, depth-of-field, until the relationship is intuitive rather than remembered. Homework goes up on a shared platform before session two.
Session two goes outside, into Hongdae (홍대). We cluster around Exit 9, where the foot traffic and social energy make approaching strangers considerably less of an ordeal than it sounds. Fill flash, sync speed limits, street photography, how to get a yes from someone who's moving and not expecting to be asked. Hongdae's energy works in your favor — nobody's surprised to see a camera there.
Before we get to session three, look at these three images. They were shot in a quiet Seoul back alley — a red brick wall, a set of steps, maybe four feet of usable space. Not a studio. But bring a portable strobe and a large umbrella on a stand, and that alley becomes a studio. This is the Seoul Street Studios philosophy in its most literal form: the studio is wherever you decide it is.
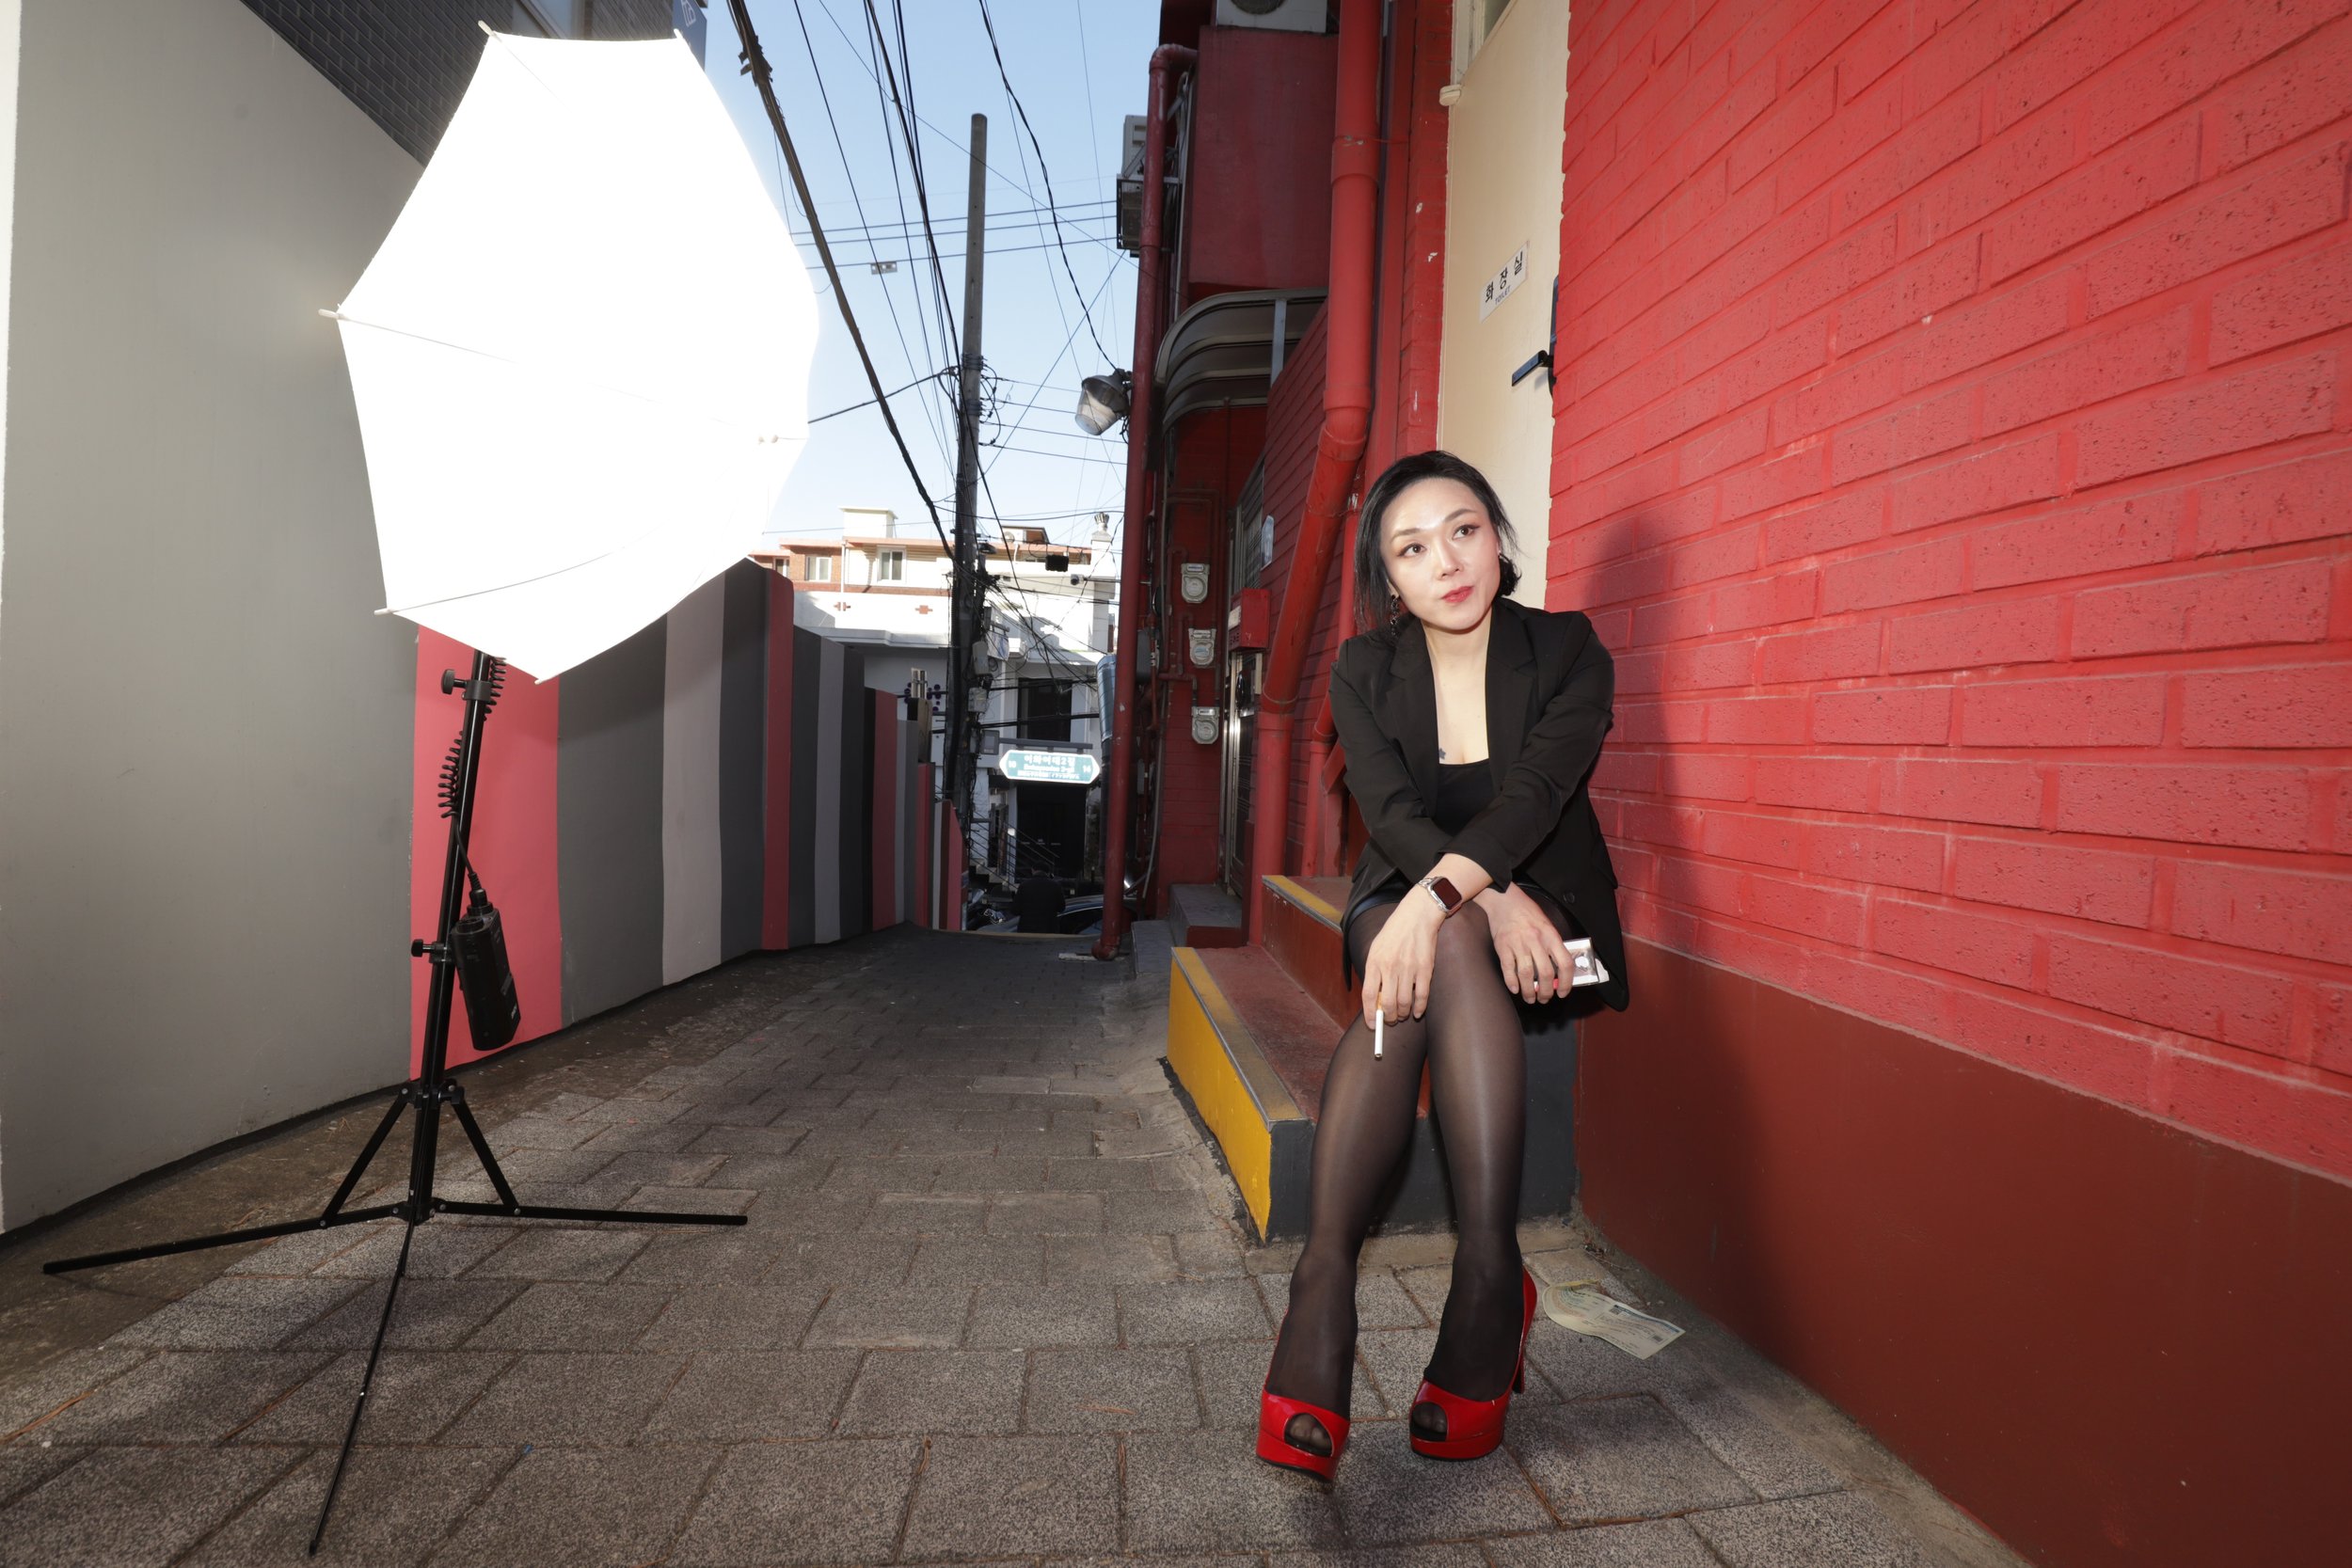
A side alley, almosst no passersby to disturb model @shinyjaky and I — so I decided to break out a portable studio strobe and large umbrella on a stand. The umbrella dramatically increases the surface area of the light source, diffusing it and softening the shadow edge, and the closer the light/umbrealla rig is to the subject, the larger its relative size, making the shadow more diffusem the ligh effectively “softer.” The shadow is still there — light always casts a shadow — but now it falls gently rather than raking. That back alley just became a studio.
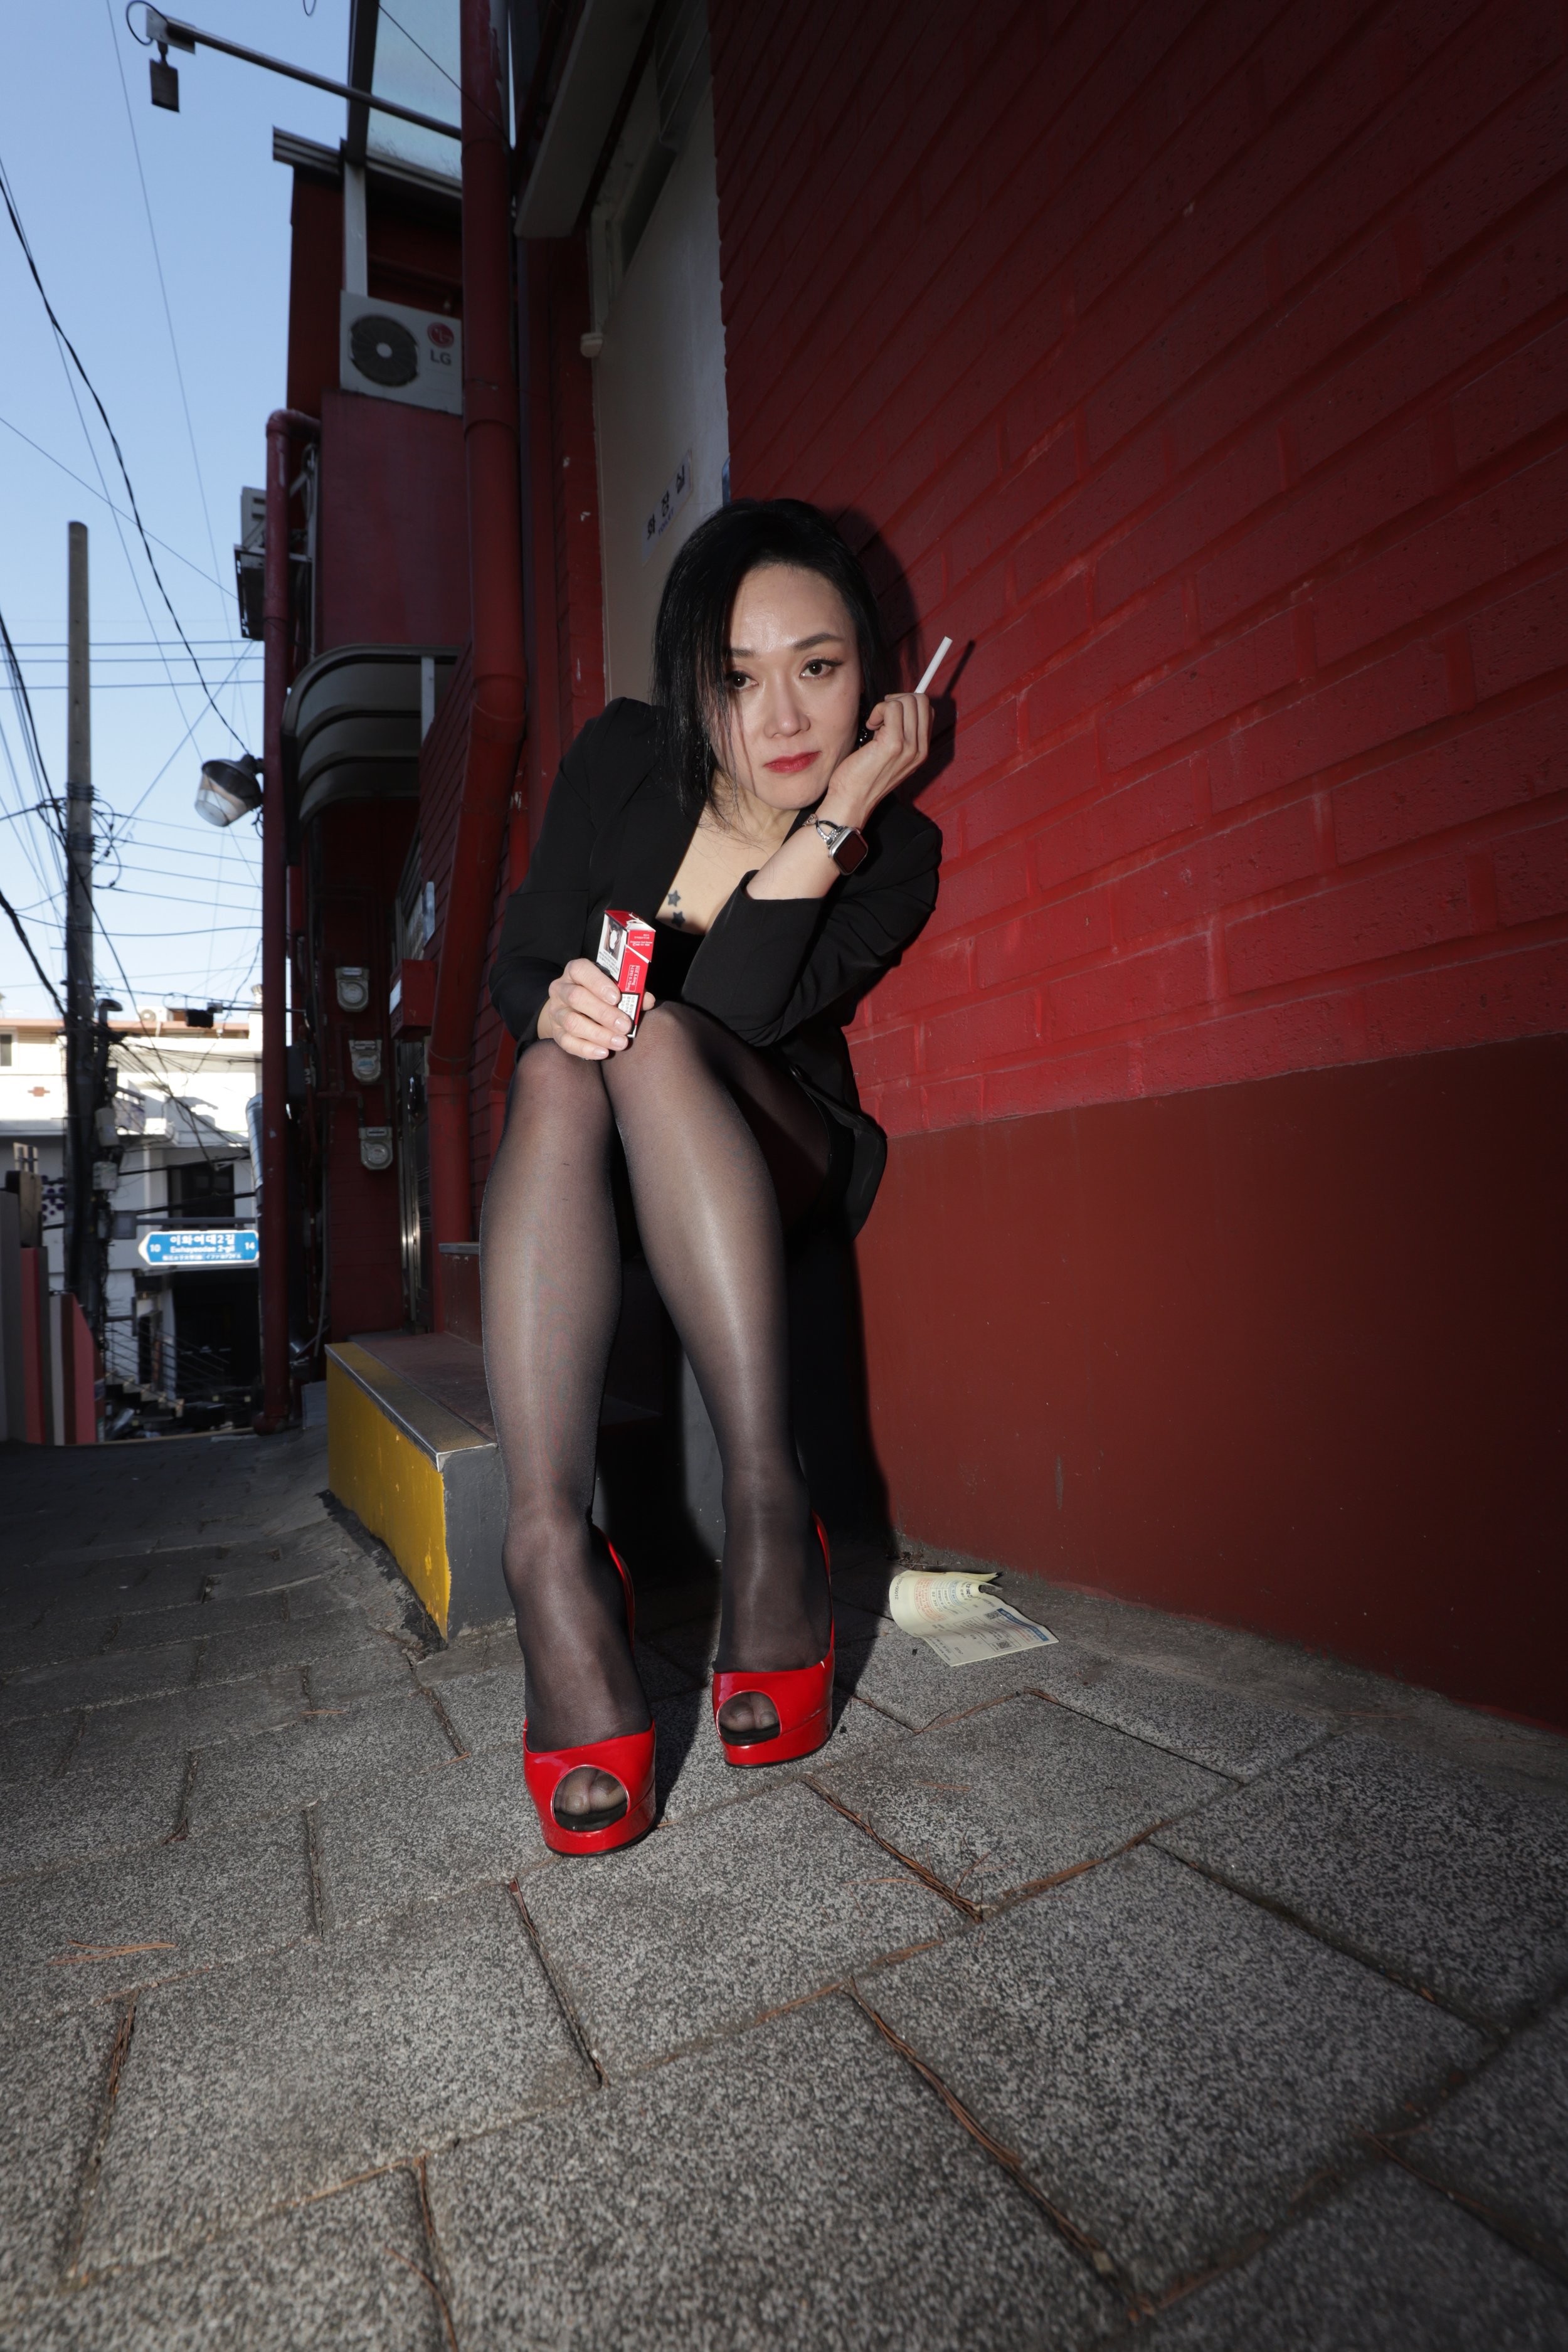
Now a flash mounted on top of the camera’s hot shoe, withcamera rotated vertical: the flash is now positoined to the left of the lens. The shadow swings hard right. Same power, same distance, same subject — just a camera rotation. Once you see the parallax effect working, you can't unsee it. And once you understand it, you can use it deliberately. I’ll use this more purposefully in the final example.
Direct flash from the flash mounted atop the camera, with camera horizontal: the flash sits just above the lens and on its axis, still casting a hard shadow, but the shadow falls directly behind the subject for the most part. to the right. Edgy as hell.
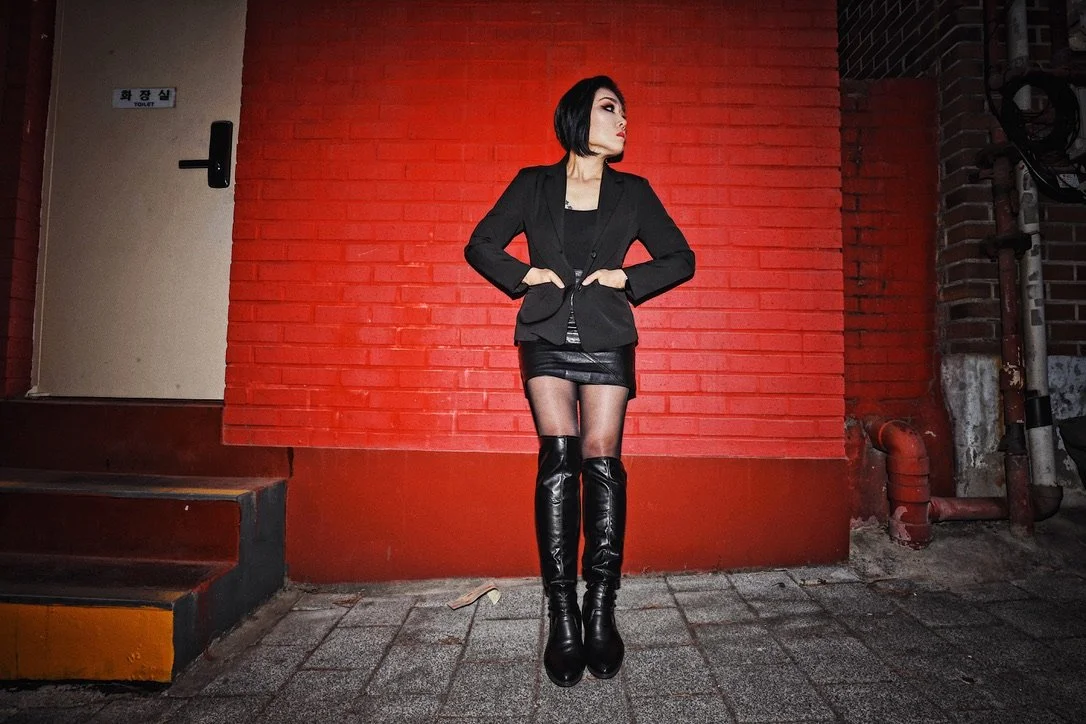
In this final example, I “cheat” a bit by not using the simple parallax effect I could get with an on-camera mounted flash, which creates a too-slight and too-harsh side shadow effect. I wante a more pronounces parallax by using my studio rig in the first picture (fired by radio remote, by the way) waaaay of camer and on a stand about half-a-meter/foot to my left, which makes the ahsdow pronounced and fall off the the right. But the shadows edges are very soft and not what we're used to with most photography. You don't get shadows like this with your camera phone and if you have a camera mounted professional strobe, even if you rotate the camera such that the flash comes in from the side angle. You're still not gonna get this pronounced a shadow falling off the subject, and only to one side. So it's a very “unnatural” effect that isn't common, which is what makes it more editorial.
OK — POP QUIZ!
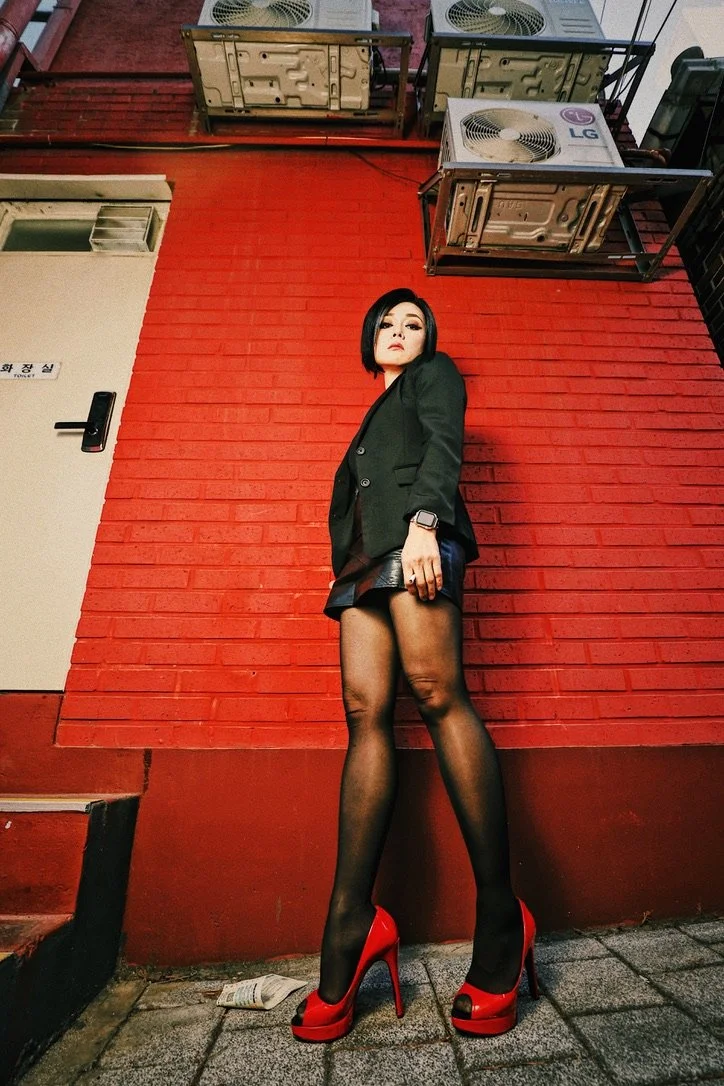
In the following photo of model @solsolyou standing in front of one of the iconic subway platform pillars of Seongsu Station, what kind of flash and flash setup am I using?
a) a camera-mounted strobe with the camera horizontal and on-axis with the lens
b) a camera-mounted strobe with the camera rotated left (counterclockwise) and the lens off-axis to the left
c) a camera-mounted strobe with the camera rotated right (clockwise) and the lens off-axis to the right
d) big rig strobe (mini-studio-style) off camera and to the left
e) big rig strobe (mini-studio-style) off camera and to the right
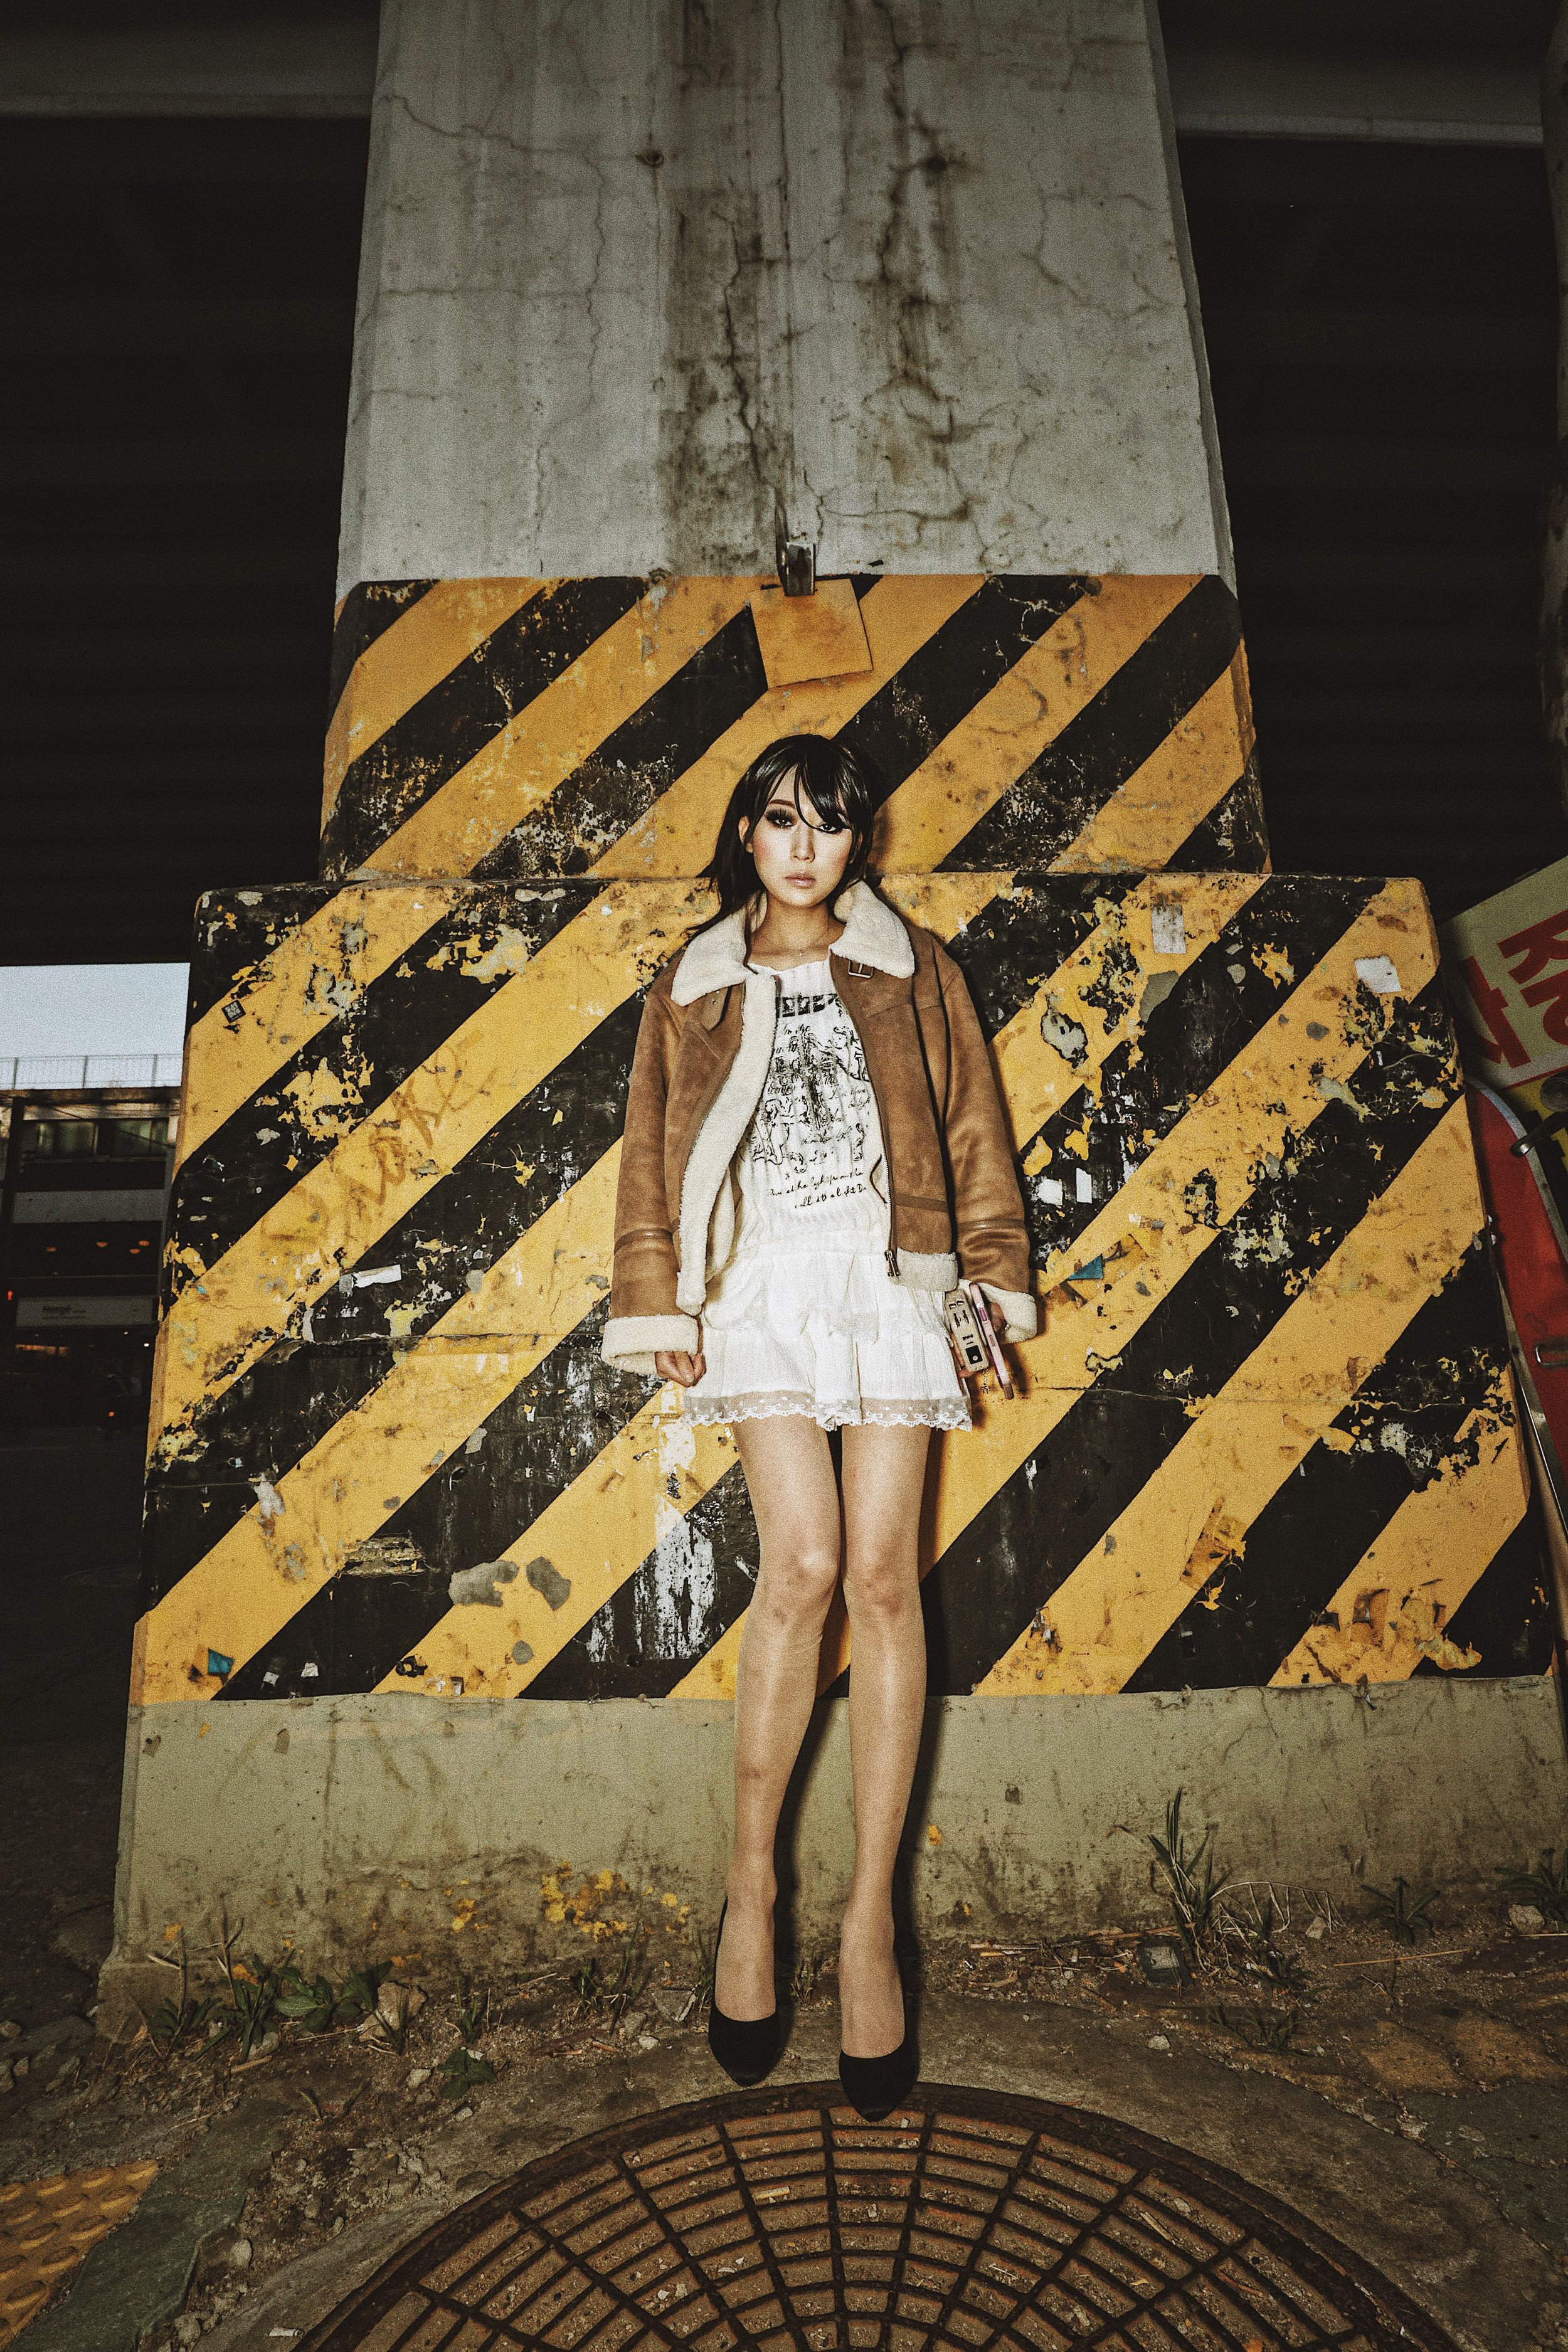
Before I spoil the fun by making the answer too close to the image, I’ll just talk for a bit about the overall flash lighting level, which is purposely a tad harshly lit and in terms of being a fashion portrait, the simple sideways parallax from the onboard flash makes it seem perhaps a bit to paparazzi and unpleasing to the eye. But actually this very flashy effect is trendy again and back in vogue. So I decided to shoot her flat and harsh in the same way that many flash pictures were taken in the 80s and 90s in the age of film. That's why so many of our pictures from that time have so many technical problems, because they were so full of on board cheap flashes on cheap point and shoot cameras that had plastic elements that made focus not tack sharp and every picture was a paparazzi kind of aesthetic. So to make the picture even harsher and simulate the imagined analog effects of film (which is generally thought to be heavy grain and more contrast, even though actually most over-the-counter, commercial films back in the day that people would buy in the CVS or grocery store weren't actually that grainy nor contrasty by the time film had run its course), I added, not only a lot of heavy grain, but also I slid the Clarity meter quite far to the right in order to bring out small details in the frame like the pattern of the manhole cover, the weeds at the model’s feet, the blemishes on her legs, as well as the wrinkles on her stockings that were one size too big, and the pock marks all over the wall behind her with all the remnants of the stickers and tape from many posters illegally hung there over the years. And also, the before after video shows just how effective digital makeup is these days, which uses AI to apply makeup effects that follow the cues of the existing makeup on the model's face already. If you slide those sliders quite far to the right, you get an extreme, grungy effect that matches the overall film aesthetic of Brooklyn in the 1990s, which is wonderfully apropos for Seongsu-dong, which has been referred to with the nickname "the Brooklyn of Seoul.”
In any case, the correct answer to the quiz is (b), and if you take a really close, look at the image of @solsolyou leaning it against the pillar, you can see the very clearly defined shadow to the right of her in the image, especially in places where her body part is further away from the surface of the structure. If you look at her arms, you can see that her left arm has a pretty sharply defined shadow that is not as far away from the wall as her legs, which have more prominently defined shadow since her legs are further away from the wall than her upper body. And even in the shot, I did cheap a bit, because instead of just the bare bulb of my flash, I stuck a mini diffuser on top of thelight so if you look at the shadow next to her legs, you can see that the edge of the shadow is just a bit softer than it would have been if I hadn't put that diffuser on. So it's another little cheat that photographer can use to separate not only the model from the background she's leaning on, but the overall quality of the image from the general images that exist out there in the world, so that your pictures quite literally POP more than other peoples pictures.
Session three takes that logic indoors, into a formal studio environment — not because indoors is where real photography happens, but because a controlled space lets every variable sit still long enough for you to see exactly what it's doing. We're joined by a working model for this session. Real studio strobes, real studio modifiers, a real person in front of your lens who is there to be photographed. This is where most students have the moment — when the camera does exactly what you predicted it would, because you finally understand the system well enough to predict it. There's also something that happens when you're shooting a real model under real lights with other students watching: the pressure clarifies everything. What you learn in that room applies everywhere: the alley, the street, the rooftop, the back of a truck. The studio is the laboratory. Seoul is the field.
Session four is integration, and we do it in Seongsu (성수). Multi-strobe, mixed ambient conditions, street fashion photography in Seoul's most visually dense neighborhood right now — converted factories, brutalist concrete next to high-design retail, street fashion that actually has something to say. Everything from the first three sessions applied simultaneously under real field conditions. The neighborhood is the final exam.
Small classes, by design. Five to eight people. Small enough that your specific camera and your specific problems get addressed directly.
The Field — ₩350,000 for all four sessions. Korean bank transfer, PayPal ($270 USD), KakaoPay, and credit card accepted on-site via card reader. Korean credit card holders can also pay in installments — 할부 (halbu) available, so the course doesn't have to hit your account all at once.
Individual session drop-in — ₩120,000 per session for photographers who don't need the full arc and want to join at a specific point. Previous students of The Field drop in at ₩100,000.
About the Instructor
Dr. Michael Hurt is a photographer, visual sociologist, and the person who brought Seoul Fashion Week its first international English-language media coverage — CNN, 2009. He has taught "Understanding the Art of Photography" at Hongik University’s Arts College and "Understanding Korea through Photography" at Myongji University, Visual Sociology at Korea University, Yonsei University, and the University of Seoul, and currently teaches Contemporary Cultural Theory at the Korea National University of the Arts (K-ARTS). He holds a PhD in Comparative Ethnic Studies from UC Berkeley and a BA from Brown University, and has held credentialed press access to Seoul Fashion Week for over thirty seasons.
A significant part of the instructor’s own photographic education happened not in a classroom but on the runway — standing next to photographers from Getty Images, other wire services, and the City of Seoul’s own hired shooters, avoiding the same light holes on the runways, while making more rookie mistakes than the seasoned pros all around, and being corrected in real time by people who had no interest in being polite about it.
On a runway, a “light hole” is a gap in the lighting rig — a dead zone where the overhead lights don’t reach, leaving the subject dark no matter what your meter says. You can have perfect settings and still blow the shot because the light simply isn’t hitting the runway correctly. I was shooting models as they hit one of those dead zones, getting bad exposures, and couldn’t figure out why — until a junior colleague shooting alongside me just said it directly:
“Hyung, you’re shooting in this runway’s light hole.”
“Your color temperature is off. It’s 3400ºK, not 4200.”
“You keep blowing those highlights because your whole exposure system is wrong for this runway.”
Other runway shooters were frank and unshakingly direct in how they taught me how to avoid the light holes.
In Korean photography culture, a junior colleague who respects you can tell you when you’re shooting wrong — for your own good. That kind of feedback — direct, specific, collegial, given in the moment while the problem is still visible in front of you — is what actually moves a photographer forward. Smiling and saying the pictures look “nice” is not a favor. It’s a stall.
That’s the teaching model behind The Field. Get you shooting. Get you running into problems. Push you toward solutions. And tell you directly — with the same collegial respect that was extended to me on those runways — exactly what’s wrong and exactly why.
The camera in your apartment is better than you currently know how to use. Four Sundays from when you start the course, that changes.
Ready to shoot, think, and move like a photographer? Register now.
Inquiries and registration: [contact link]